Ready Seat Belt

レディー・シート・ベルト

A look into the cool and bizarre, focusing on the Japanese import car culture and delicious ramen. Updated weekly.

  • Home
  • Blog
  • Food
  • Archive
    • Complete Archive
    • Ramen Archive & Map
    • Suzuki Alto Works HA11S
    • Suzuki Alto Works HA12S (Scrapped)
    • Suzuki Swift Sport ZC31S (Sold)
    • Suzuki Wagon R MC22 (Scrapped)
    • Newbie Guide
    • Photography
  • About
  • Facebook
  • Instagram
  • Twitter
DSC09839b.jpg

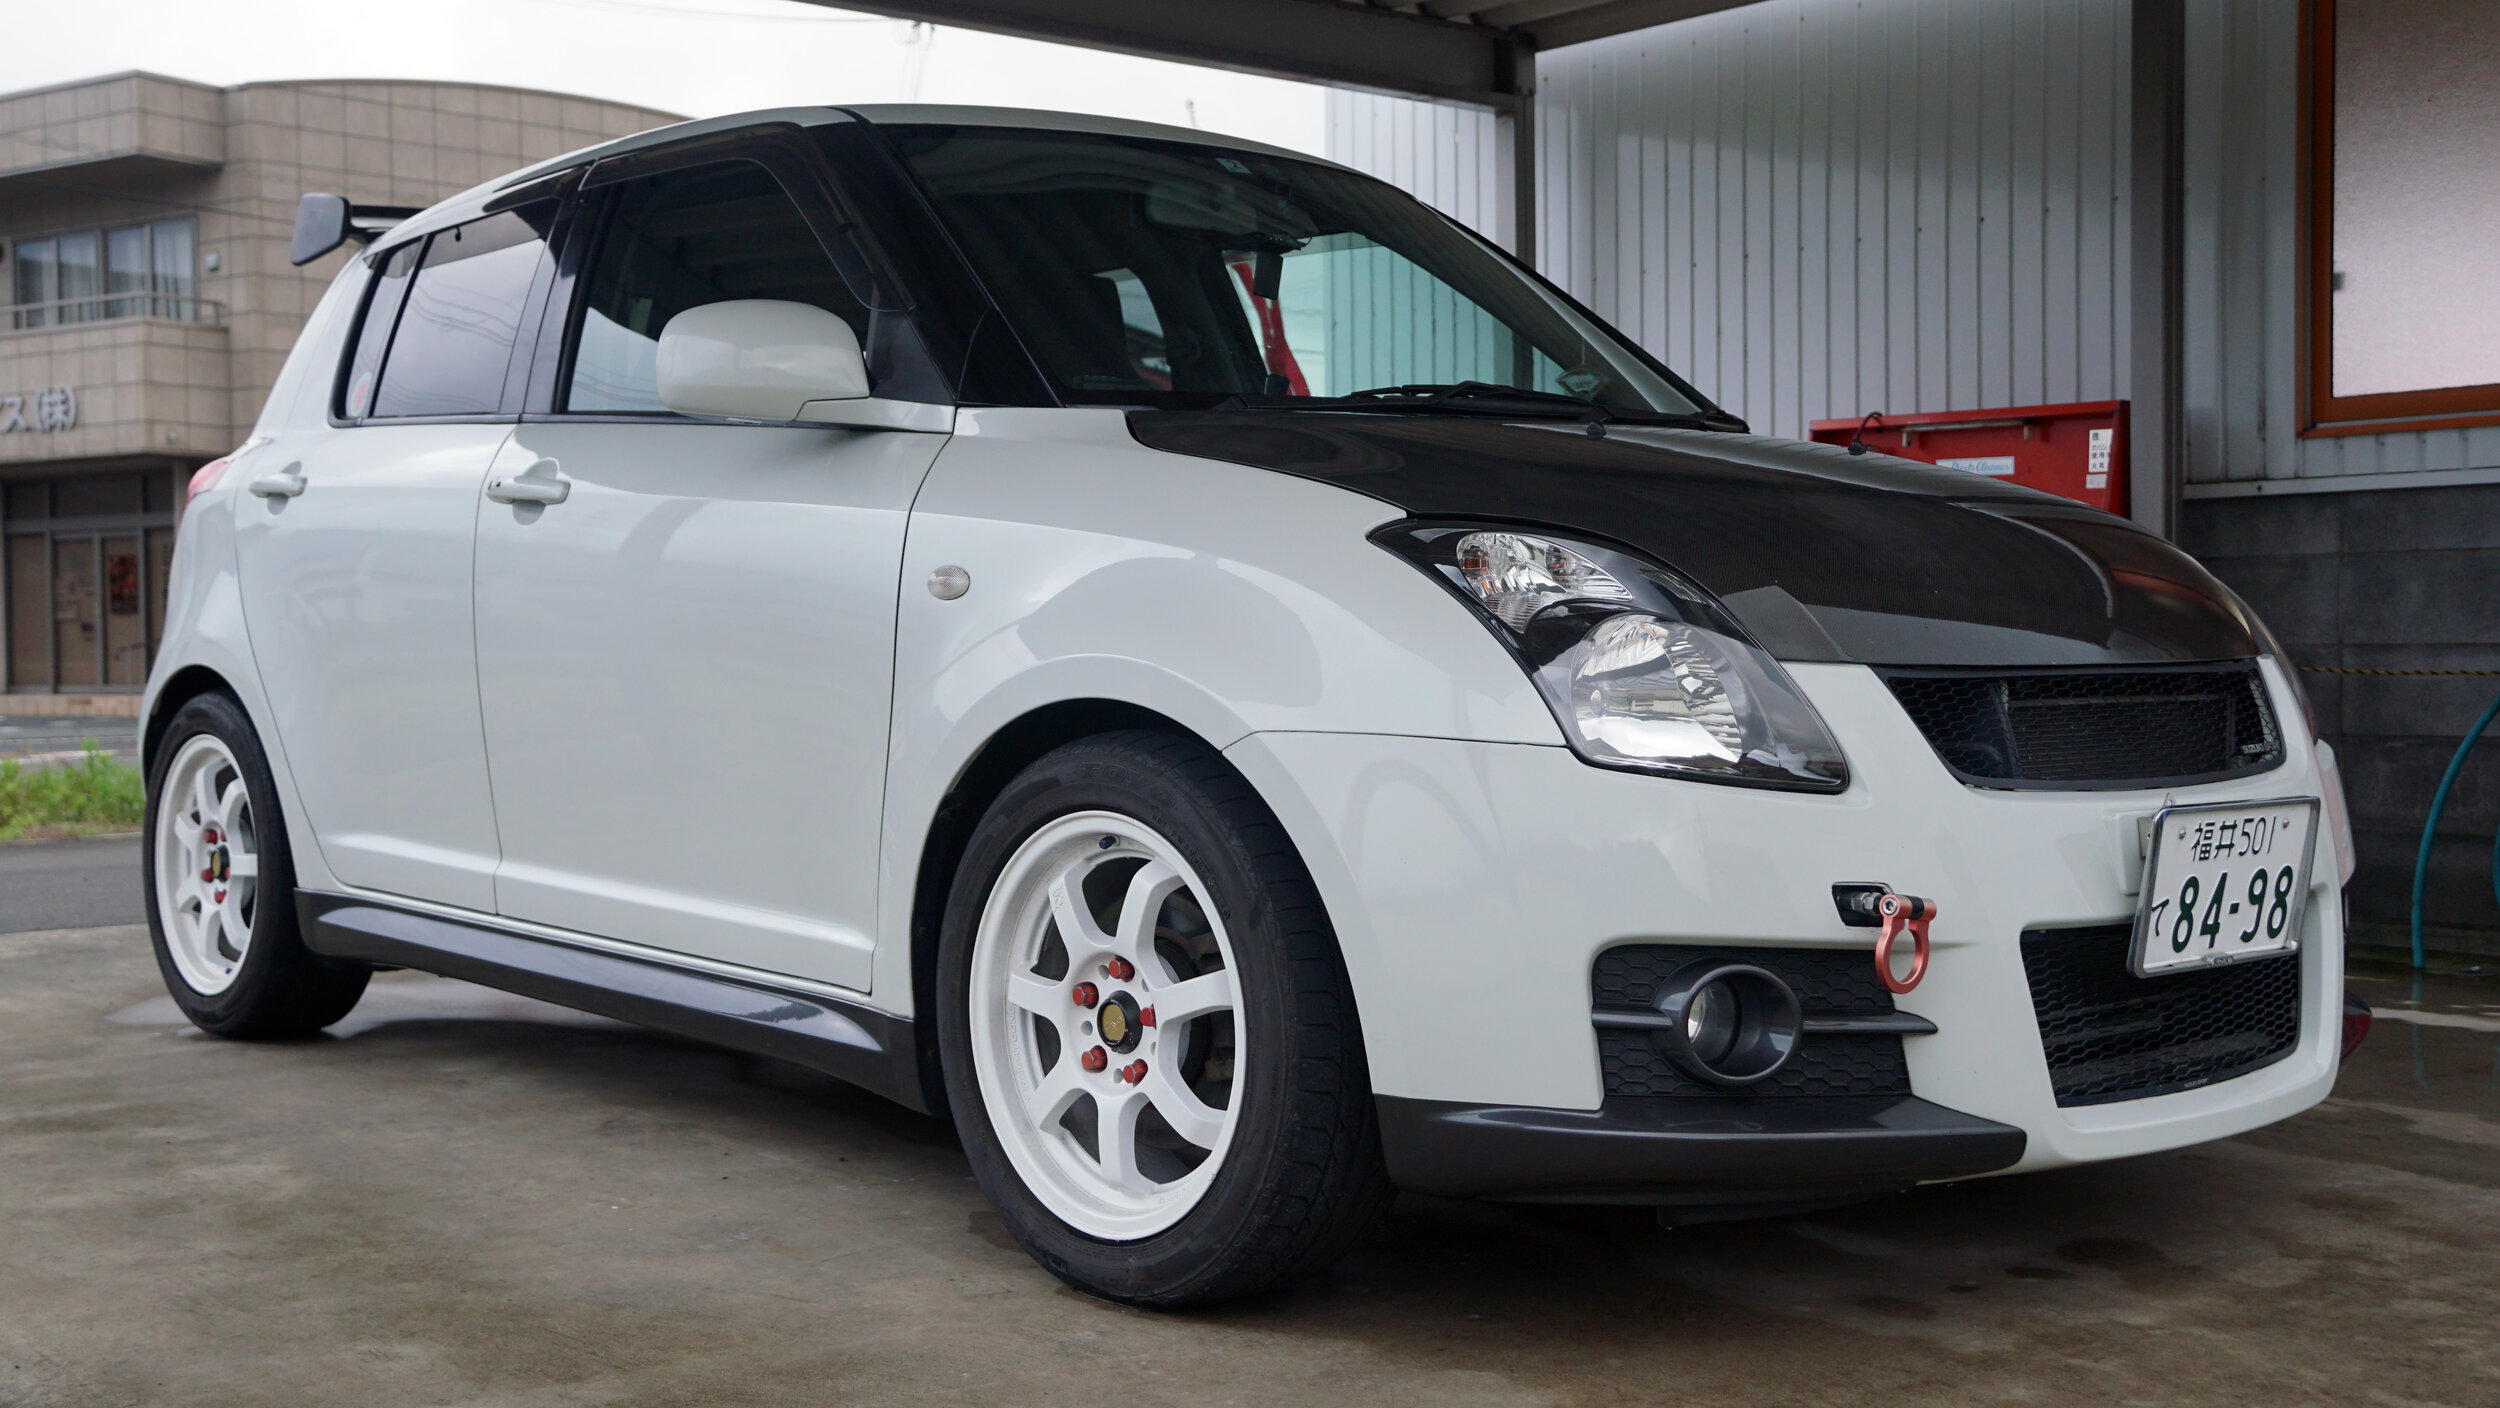
[ Swift Sport ] Project Mu TYPE PS Brake Pads (Modifications, Part 5B)

November 13, 2019 by William Tjipto in Cars, Japan, Ownership

I agonized weeks over the decision on my replacement front pads, comparing prices, reviews, and brands of several major manufacturers. Prices range from 3000¥ ($25 USD) for OEM-level equipment, to well over 20,000¥ ($190 USD) for track-use pads. Since the fronts do a lot of the braking work, especially for a front-engined, front-drive car, and the fact that I do somewhat harsh spirited street driving, selecting carefully between price and braking performance is critical. Also because this is a daily-driver, cold braking performance, brake dust, and noise are also important.

Due to a lack of real trustworthy reviews I could rely on, I recognized price is not the only determining factor. My Miata has cheap Pep Boys pads, but as I hinted before, pads do not make the only difference. For that car, I used high quality DOT4 fluid… and the car stops consistently well, even after hard autocrossing and track use. Granted, the car is rather light, but that setup is more than good enough for my use.

For my Swift Sport, though, I finally settled on a set of TM Square Street Brake Pads which are priced at 8600¥. TM Square is a small, but well-known manufacturer of primarily Suzuki Swift parts. While I’m fairly certain they don’t make the pads in-house, they claim their pad compound was engineered specifically for them. The company has a lot of race experience with Suzukis, so I expected them to work fairly well.

DSC09609.JPG

However, I was glad I was patient on the decision-making because during the waiting interm, I found a great deal on a brand new, unused but “second hand” set of Project Mu TYPE PS pads. They originally retail at  20,000¥, but because they were considered “open box”... they were about 5000¥ ($45 USD), shipped. Ridiculously cheap for arguably one of their best overall pads from a well-respected manufacturer, as these pads claim to have a great balance of braking performance, pedal feel, little noise, and reduced rotor wear.

DSC09615.JPG

I opted not to replace the rotors at this time, given that the overall condition of them are still quite good. Maybe after these stiffer pads wear down would I replace the rotors then.

DSC09617.JPG

Time to put it up on a lift and replace the brakes. One thing I absolutely love about modern disc brakes is the fact they are super easy to replace. Remove the one lower bolt and the whole brake assembly pivots on the upper bolt.

DSC09621.JPG

Perhaps the most difficult task is to push the piston in… without the right tools, it’s a minor hassle, but luckily I have access to a proper piston compression tool here at Rodeo Cars.

DSC09625.JPG

After a bit of cleaning and some application of high-temperature lubrication to minimize pad chatter, the whole assembly is back in place. This is also a good time to drain a bit of the brake fluid and replace it with fresh fluid. Since it is still pretty clean from my last shaken, it doesn’t need a full drain or flush.

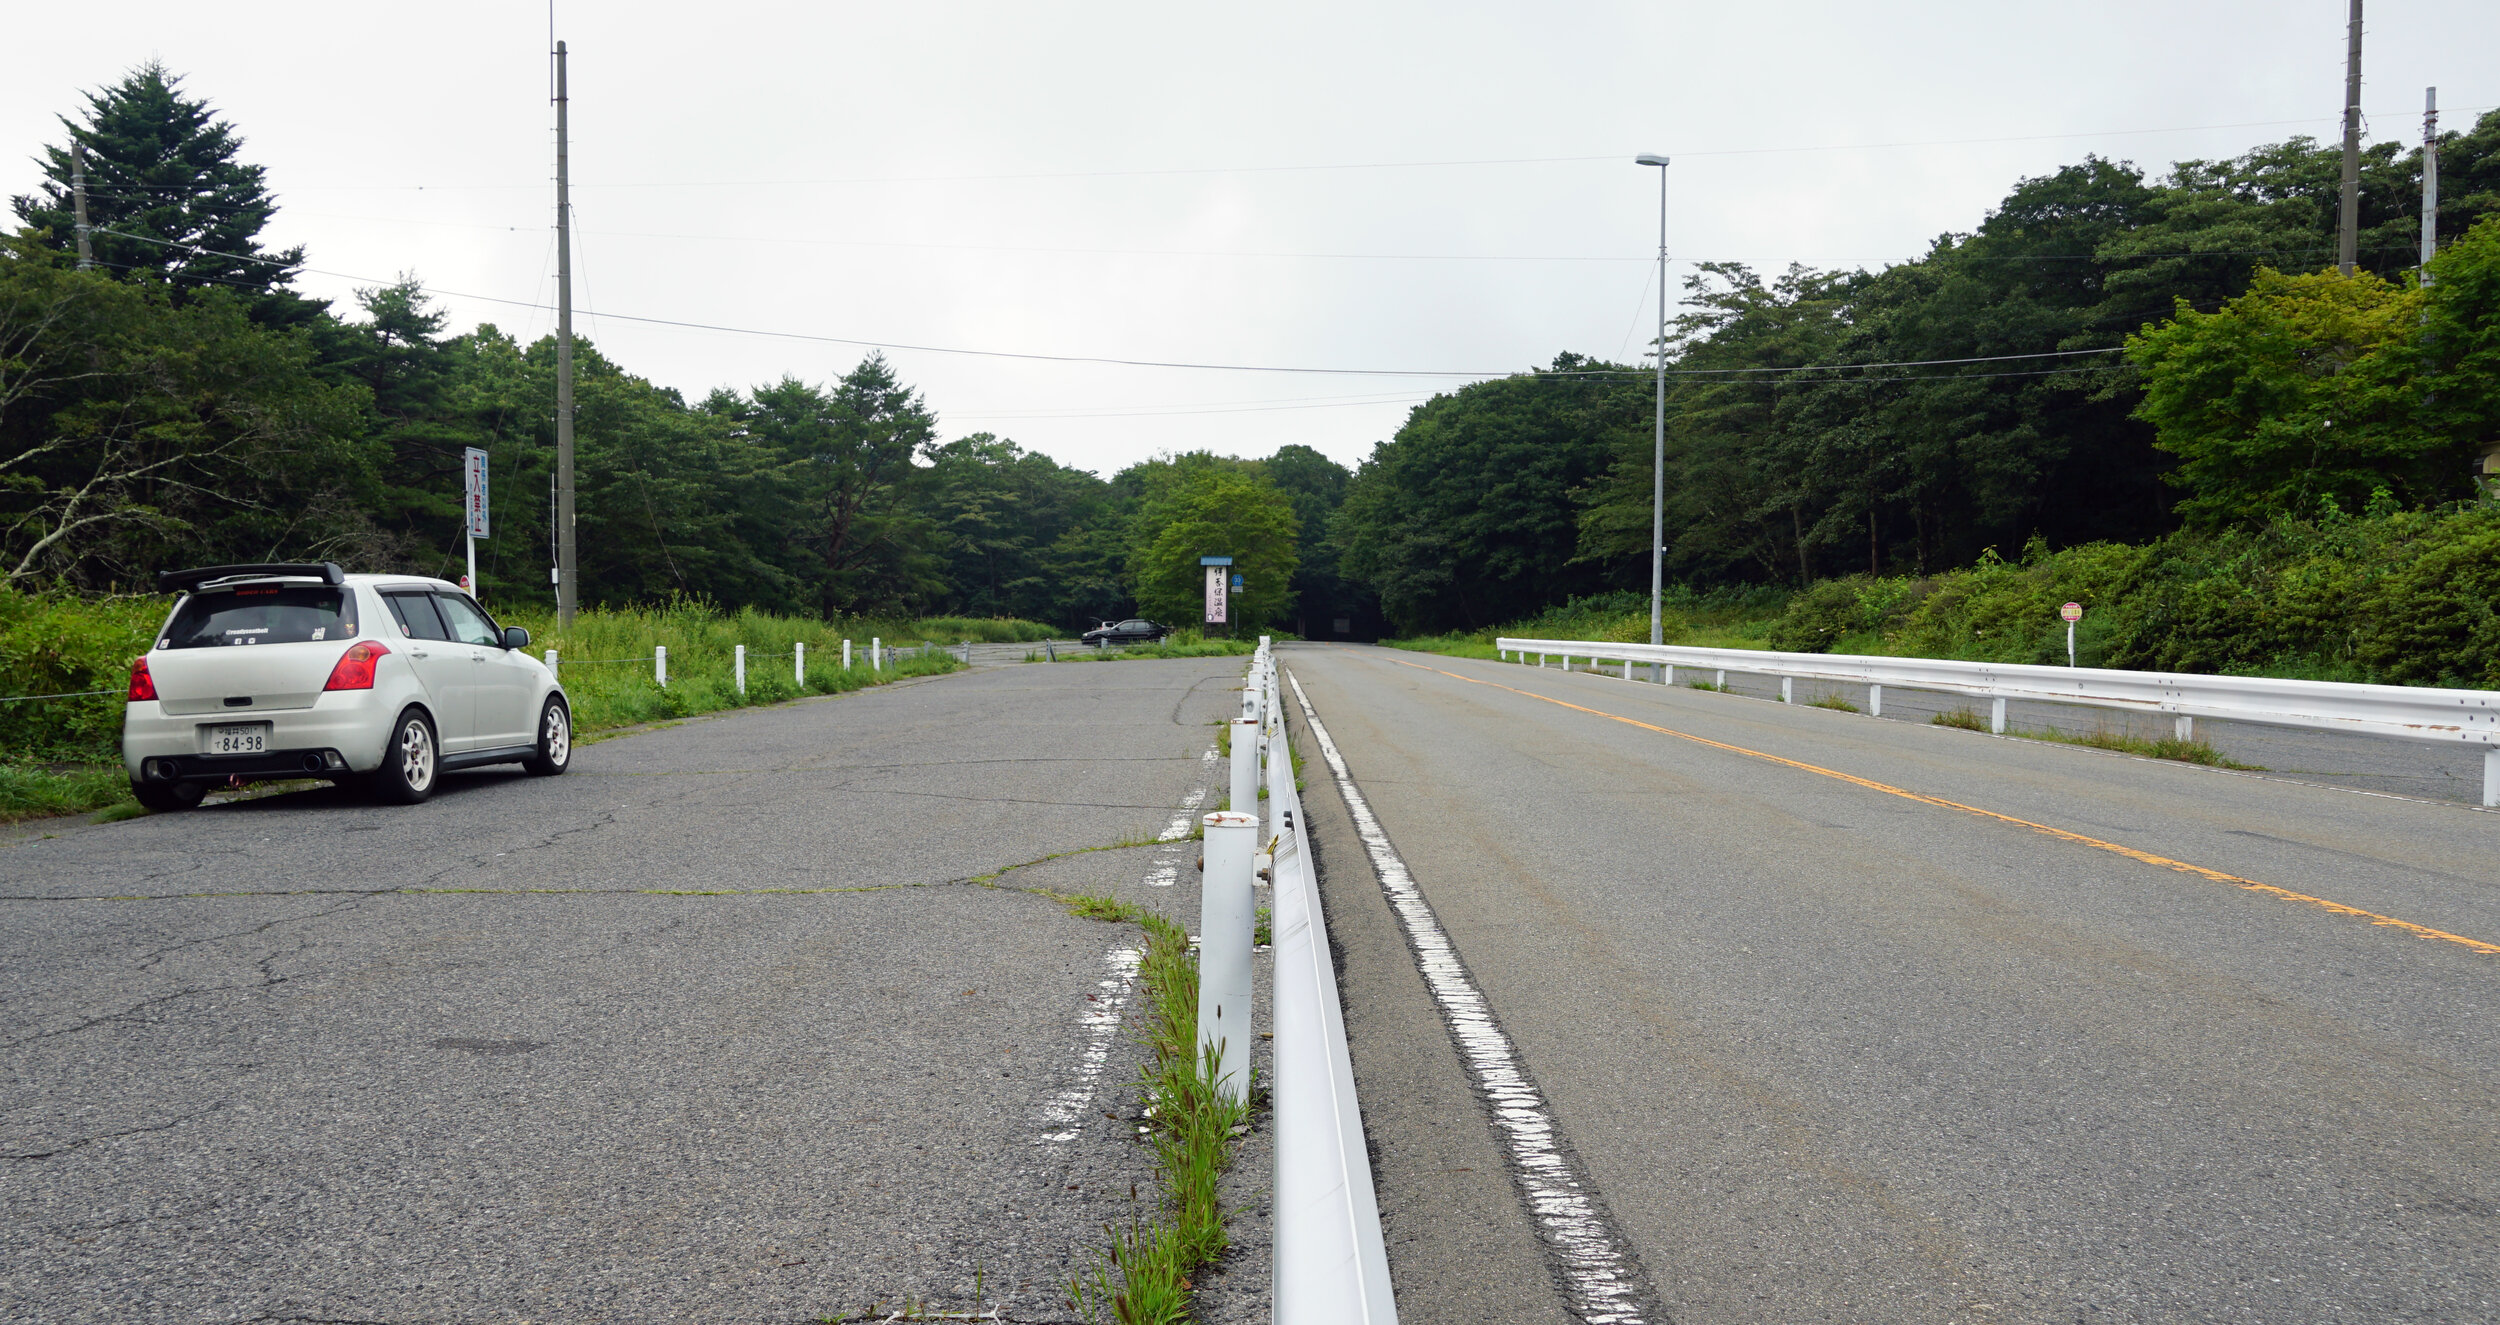
The first thing that needs to be done once everything is cinched back up is bedding the brakes. The process to bed in a brake pad is pretty easy, but it’s quite important. The main reason to do this is to ensure some friction is done and wear surfaces are mated properly. Essentially, I need to heat the pads and rotors sufficiently by having a few relatively hard high-speed stops. Without anyone around, I found some empty stretches of road nearby where I could do this safely and not bother anyone.

After a few hundred kilometers of fairly typical street driving, my initial impressions are pretty darn good. The brake pads have never squealed (other than the first drive after a wet night due to rotor rust… but that applies with all cars). The brake pedal is firm and braking pressure is consistent.

I only had a chance to flex the pads a bit on some local winding roads before I made this post and I can say quite certainly they are as they claim. I purposely tried to quickly push hard on the brakes on every corner in order to get the brakes as hot as possible. The initial bite is strong and feels consistent through several hard braking passes. Even afterwards, I noticed minor brake dust on my wheels, but it is not that much different than the previous pads and to be fair, I tried to drive relatively hard on them.

In truth, however, I have not tested them to their maximum heat capacity, so how they fare on hard driving or circuit driving is another matter. I do have faith in their advertised performance based on the driving I did thus far and Project mu’s reputation in racing. Brake job done!

November 13, 2019 /William Tjipto
JAPAN, JDM, SUZUKI, ZC31S, CAR, CAR LIFE, M16A, RHD, スズキ, SWIFT, スイフト, SWIFTSPORT, スイフトスポーツ, 自動車, 軽自動車, 日本, 車, HOTHATCH, FF, FWD, CARBONFIBER, カーボン, LANCER, LANCEREVOLUTION, EVOLUTION, EVO, エボリューション, ランエボ, 三菱, MITSUBISHI, MAZDA, マツダ, ロードスター, RAYS, レイズ
Cars, Japan, Ownership
Comment
(Points if you can recognize this location.)

(Points if you can recognize this location.)

[ Swift Sport ] Project Mu TYPE PS Brake Pads (Modifications, Part 5A)

November 08, 2019 by William Tjipto in Cars, Japan, Ownership

After all my recent Hokkaido and Eastern Honshu road trip around Japan, my brakes have been run down to about a quarter remaining, so I figured one of the most important “modifications” I can do is maintenance in the form of a good brake job on my Suzuki Swift Sport.

Brakes are one of the most important safety aspects of a car. In conjunction with good tires, good brakes can literally be the difference between life and death... or a wrecked car. Almost all modern cars use disc brakes, but some economy cars, such as kei cars, use drum brakes for the rear. Their stopping methods are different and there are some minor positive reasons to use drums over discs for the rear, but suffice to say most sport-oriented cars utilize discs all around.

2018-12-09 016.JPG

Disc brakes, as the name implies, use large, typically steel, disc rotors attached to the wheel and hub. One or more brake pistons push against brake pads which apply pressure to the spinning disc, slowing the car down by changing the kinetic energy state to sound, heat, and wear. Most discs also incorporate vents and spacing in the center of the disc to better dissipate heat. More advanced rotors are made of materials that better reject or give off heat like carbon-ceramic or use of mixed metals like steel in the disc and aluminum in the hub hat.

The stopping action of disc brakes is very similar to the way a typical brake system on a bicycle works, with two little pads applying pressure against a spinning disc. Well, in the case of a bike, the wheel itself.

DSC01958.JPG

Drum brakes are a completely different design, because they utilize brake pads that push outwards against a spinning brake drum to reduce speed. The main problem with this setup is the inability to reject or reduce heat quickly, critical for sporty applications. 

DSC_4018.JPG

The benefits of a disc brake are numerous which is why almost all manufacturers currently employ at least disc front brakes. They reject heat quickly, are durable and easily maintained, and may have better stopping power than most drums. Some economy cars utilize drum brakes for the rears simply because of manufacturing costs. However, on off-road truck applications, drum brakes can have some advantages. Drums are essentially sealed items, so in muddy, dusty, or wet applications, drums can still stop despite environmental effects. One additional benefit of drum brakes is the ease and reliability of the mechanical parking brake which does not require the hydraulic booster system to function at all, since the lever actually moves the brake pad directly.

DSC_6272.JPG

Brakes are an oft overlooked modification for ricers (Iike me). Some car guys dump money into exterior mods or some into improving power or handling… but overlook or cut corners on the brakes. For me, many of the cars I’ve had stop well enough with their stock setup… that’s my excuse at least.

Basic upgrades to brakes mean replacing pads to a more aggressive compound. This usually means more dust and noise, since a more heat-resistant, “stronger” material means more sacrificial wear to the rotors and eventually, the pad itself, resulting in more frequent replacements.

DSC_3453.JPG

The next level of upgrade is usually to also replace the stock rotors with slotted or cross-drilled disc rotors. Such opening slots allow worn dust and material to be “swept away,” and there are some additional cooling benefits to the increased surface area, but there are some drawbacks like the additional risk of warping or cracking under extreme duress.

IMG_2389.JPG

The biggest upgrade is to replace the brake system with larger calipers, allowing the use of bigger pads and discs. Some larger calipers also mean there are more pistons which can put more consistent and firmer pressure on the pads, resulting in amazing stopping distances, repeatable over prolonged use. (Assuming the tires are not the weakest link.) Of course, model-specific brake upgrades can be wildly expensive.

Is it all really even necessary? It’s true stock brakes can more than handle slowing a car down quickly for normal day-to-day traffic. But repeated, quick, and harsh stoppages in extreme conditions as found on a racetrack or even on a long touge mountain run, the brakes “fade” and squeak in agony due to warping from heat and pressure, potentially leading to spongy, inconsistent braking feel, weaker pressures, or failure to stop.

IMG_4975.JPG

It sounds strange to say brakes “fade” because they are still there. It actually just means brake pressures fade or weaken to the point of failing to stop as expected. Assuming the pads and discs are otherwise properly maintained, the most common fault of brake fade during spirited driving is fluid fade, the boiling of the brake fluid itself due to heat transfer. This increased heat in the fluid leads to air separation and loss of pressure. Typically, one can feel the fading gradually from a “spongy” brake pedal that requires more pressure than usual to slow the car.

The commonality of all modern brakes is this brake fluid. The standard OEM-supplied brake fluid is acceptable, but DOT4 or synthetic fluids allow much more heat transfer before the liquid reaches the boiling point, allowing consistent brake feel during aggressive use.

But I digress… it’s time to change the brakes on my Swift Sport!

November 08, 2019 /William Tjipto
JAPAN, JDM, SUZUKI, ZC31S, CAR, CAR LIFE, M16A, RHD, スズキ, SWIFT, スイフト, SWIFTSPORT, スイフトスポーツ, 自動車, 軽自動車, 日本, 車, HOTHATCH, FF, FWD, CARBONFIBER, カーボン, LANCER, LANCEREVOLUTION, EVOLUTION, EVO, エボリューション, ランエボ, 三菱, MITSUBISHI, MAZDA, マツダ, ロードスター, RAYS, レイズ
Cars, Japan, Ownership
2 Comments

[ Swift Sport ] GP Sports Exas Evo Tune Exhaust (Modifications, Part 3)

October 10, 2019 by William Tjipto in Cars, Japan, Ownership

Early on, I focused on the interior touch points and bracing for my 2007 Swift Sport, but it was about time I started messing with the looks of the car. With the carbon fiber hood and spoiler, it was already very nearly perfect, though there are improvements I wanted to make.

2018-07-16 006.JPG

I picked up a flush aluminum rear wiper plug off of Yahoo! Auctions to remove the rarely used rear wiper. This simple, cheap part really cleaned up the back window end.

The next two small, but quite noticeable parts I ordered were front and rear tow hooks. I admit these were added for primarily cosmetic reasons, but they do serve a purpose on a track day. If I ever had an off-road excursion and the car needed to be pulled away, having two easily identifiable tow points are a necessity. Not to mention it could prevent further damage to other bits of bumper bodywork if a tow truck needed to latch on bottom frame points.

2018-05-27 004.JPG

Fine, fine, I’ll concede they are purely cosmetic. This car isn’t likely to be tracked anytime soon, but these tow hooks do attract a lot of attention from non-car fans. This is probably my most inquired-about modification. I’ve probably had a dozen people ask me, “why?” And my answer is always, “Because race car.”

For the rear, I picked up an aluminum universal rear tow hook which clamped easily on the bottom rear tow hook. Not only is it potentially useful on a track, as it sticks out past the muffler tips and bumpers, it is also a preventative safety device. Backing up into tight parking spots is the norm here in Japan and should I ever get too close to a wall or low curb, the tow hook will be scraped or damaged instead of the bumper.

The front tow hook is a screw-in design that can attach to both the threading here in the front and to a hidden threaded hole in the lower rear crash beam as well. However, as this rather cheap piece is aluminum, it is definitely not for actual towing use. It will likely be damaged or deform under heavy tow stresses so essentially this part is 100% for looks only. The car does come with an actual, non-folding tow hook in the tool box in the trunk, so this piece can be removed easily and the other hook bolted in without tools.

I really enjoy the nice, reasonable sound of the Fujitsubo Authorize R exhaust, but not enough for me to keep it. I wanted a throatier sound, so after listening to several dozen test clips online of other various manufacturers, I narrowed down my choices. The Suzuki Sports, HKS, and Trust exhausts were too quiet and barely louder than the Fujjitsubo, if at all.

2017-11-12 010.JPG

I finally came across GP SPORTS, which I had not heard of prior, but with a bit of research, it turns out they are quite prolific in Japan, making a huge range of exhausts for many Japanese cars. I heard a few clips of their dual exhausts on other car models and I was impressed. Not to mention, the titanium tips really added a gorgeous, sporty look. Eventually, I came across a great deal on a used unit from Upgarage for a steal at 39900¥ ($372 USD) in absolutely gorgeous condition. There was no way this exhaust had to be used more than a few thousand kilometers.

The exhaust was also surprisingly lighter and absolutely beautiful on the car.

IMG_2067.JPG

It reminds me of my old HKS Legamax exhaust on my Evo X, but this one is way louder and deeper. The sound under load and deceleration is nice and throaty. There is a more pronounced growl in the cabin with the windows down, but not significantly annoying with the windows up and there is minimal drone. Passengers, particularly those sitting on the rear seats, complain that it is a bit loud when I’m driving aggressively. Certainly a good thing in my opinion. Idling decibels are only a fraction louder, very important in traffic and when I spend the minute or two to warm up my car in the morning.

You can hear it for yourself in the above clip. In a word: Perfect.

2018-04-03 042.JPG

I really love the look of my WORK Kiwami wheels, but the thin, multi-spoke look doesn’t quite go with the bulbous, plain panels of the Swift’s bodywork. Smaller diameter wheels also look better and ride softer as a daily driver, so I looked around for 16” wheels. I was lucky to find some RAYS Gram Lights 57 wheels, wrapped with grippy Toyo DRB tires, also off of Upgarage for a great price of 40000¥ ($372 USD). They are the perfect size, offset, and fit for my Swift.

DSC01597.JPG

While they came in reasonably good condition, I figured a few coats of paint would really make them pop. Many layers and a long while later, here are the results.

If I say so myself, the white looks amazing on my Pearl White car.

October 10, 2019 /William Tjipto
JAPAN, JDM, SUZUKI, ZC31S, CAR, CAR LIFE, M16A, RHD, スズキ, SWIFT, スイフト, SWIFTSPORT, スイフトスポーツ, 自動車, 軽自動車, 日本, 車, HOTHATCH, FF, FWD, CARBONFIBER, カーボン, WORK, WORKWHEELS, ワークホイール, CRKIWAMI, KIWAMI, GREDDY, トラスト, GPSPORTS, FUJITSUBO, フジツボ, 藤壺, マフラー, EXHAUST, MUFFLER, RAYS, レイズ
Cars, Japan, Ownership
7 Comments
2018-12-14 006.JPG

[ Alto Works ] Christmas Shaken

February 26, 2019 by William Tjipto in Cars, Japan, Ownership, Project Sachiel

Christmas brings presents, cheer, Starbucks Pistachio Christmas Tree lattes, and, for my precious little Alto Works, dreaded shaken. As mentioned previously, shaken needs to be done on all actively operating cars in Japan. As with most cars and my little Alto, it needs to be performed every two years to ensure proper operation. My shaken was due on December 25th, Christmas Day. I wonder if one of the previous owners, years ago, bought himself this car as a present?

Part of the shaken process involves going to the local city hall and paying a “recycling fee” for the car. This is a huge chunk of the shaken cost and rises with the car’s age. For me, it came out to around 25,000¥ ($230 USD).

The next thing I had to do was bring the car to as stock as possible. Surprisingly, according to my mechanic, the engine bay with my HKS Filter, heat shields, and oil catch can would be acceptable to leave as-is. My Nardi steering wheel, rear pillar bar are acceptable, as well. However, the East Bear Sports bucket seat and wheel spacers would all have to be brought back to stock and removed because they violate the rather strict shaken rules for one reason or another: The stock seat needs to be used for safety and the wheels must be within the fender width. (With the spacers, the spokes on my Volk wheels were just past the fender by a few millimeters.)

After putting the two parts back to stock, I took some time off on a Friday to head up to Sabae City with my friend Matsuda-san from Rodeo Cars. The first stop was Autobacs. (Autobacs is the Japanese equivalent to Pep Boys or Autozone in the states, but way better.) There, I needed to perform two labor jobs: an alignment and a headlight level adjustment. The alignment would be to ensure the wheels don’t have too much of a negative camber and the headlight check is to ensure the beams are pointed in the right direction; not too high, not too low, not off to the side.

2018-12-07 006.JPG

Autobacs
The alignment was 3000¥ and 1000¥ for the headlights. Once paid, the mechanic drove it on the rollers and began to mess with the headlights. A few minutes later, he started work on the alignment… and that’s when we ran into serious problems. He drove it off the rollers on to a lift and tried to adjust my suspension as much as possible. Alas, after 20 minutes, he came up to talk with us and tell us the bad news that the car would not pass shaken because there was too much negative camber. He said the headlights would probably pass, but offered no vote of confidence either way.

Sadly, this means I had to bring my Sport-Service front suspension back to stock, as well. Turns out my 1.5 hour drive to Fukui City would bear no shaken fruit this day. That following weekend, I replaced my front suspension back to stock and had it re-realigned at a (pricier) place in my town.

Driving up again on the following Friday, I once again had to stop by Autobacs for another adjustment of my headlights since the ride height of the car changed since last time. Once again, the mechanic suggested that it may pass. My friend suggested we give it a shot anyway.

2018-12-14 016.JPG

Arriving at the Kei Car Automotive Association Center a few kilometers away, we first had to pay for a tax fee based on the car class, for me totalling around 8800¥. Then the wait in a short procession of cars for the inspection. A nervousness came over me, as there are a few modifications to the car I felt would not pass muster. Rolled fenders, hood vents, oil catch can, cut rear bumper, front intake snorkel… I heard about how strict shaken was and that brought dread. Would this end up another wasted weekday?

2018-12-14 031.JPG

The first stage was visual inspection. Ride height, general body condition, engine bay, wiper function, and paperwork were checked here. As expected, I was questioned about the front intake snorkel. My mechanic insisted it was for looks only and that it did not directly connect with the air intake. (Which is true… it merely leads to the intake.) Surprisingly, the hood vents, the heat shields, HKS filter, and oil catch can did not bother them in the slightest. No other comments were made about my bumper or fenders, thankfully.

2018-12-14 033.JPG

In the next stage, the car is driven onto rollers. Here, the car is checked for alignment, acceleration, brakes, and parking brakes. My car passed with flying colors, but then came the headlight machine which checks the brightness, spread, and aim of the headlights. Almost immediately, the screen above spat out an “X.” Universal, really, for fail.

A “mini boss” showed up here at this point, confronting me about my exhaust sound. I’d like to say the overeager young lad here annoyed me greatly. (Having already been disheartened by the failed headlight check.) The decibel sound, to me, is very obviously within the sound tolerance limits; I’d argue that some stock exhausts sound louder than this does. But it was his prerogative to challenge it and so he called on his manager to double check the sound just by listening to it. One sharp rev and the manager didn’t even blink and passed me. Thank you, good sir, for being reasonable.

2018-12-14 028.JPG

The final stage of this shaken process involves a lift and visual inspection. My car is in overall great condition, with little rust, so this stage was a breeze. No issues were detected and I breathed a sigh of relief… the front suspension is riding on partially cut springs, afterall.

The time was now 3:30PM and the facility closes at 4:00. This gave us a few minutes to attempt another run through. Luckily, I brought a set of stockish, blue-tinted halogen H4 bulbs that were on my car initially. We rushed to replace the HIDs with these bulbs, reaching behind the small space behind the headlights. No time for cleaning up wires and putting the rubber gaskets back on, we tried again.

The staff once again questioned the front intake snorkel. (They literally saw us not 15 minutes ago!) They weren’t sure the bulbs would pass, but allowed us to check the headlights anyway...

And it was so close. The last boss was proving difficult to defeat, as the right headlight failed by a few degrees. Apparently, according to the aforementioned young lad, it needs to be pointing up just a bit. He said if we were quick, we could do one final run-through. It was past 3:50 at this point...

For the final check, the staff let us pass through visual and roller check. Once I heard the ding and saw the “O” “O” for the headlight check, I nearly cheered out loud. That was, as the Japanese say, “girigiri,” as in “just barely.”

2018-12-23 011.JPG

I received the victory medal, a slip of paper and a freshly minted shaken decal. This would proudly go on my car the next day. Other than you readers, probably few others know of the struggle I had to obtain it. First world problems, I know.

To my recollection, this is the breakdown of all the costs associated with my shaken on my 1998 Alto Works. Your prefecture and car will vary.
Car weight tax stamp fee 8800¥
Examination fee 1400¥
Recycle fee 25000¥
Headlight adjustment fee 1080¥
Alignment adjustment fee 3000¥ to 4000¥
Delivering to Fukui ~4000¥ > 8000¥
Fluids change 5000¥ (This will vary greatly, since I am more or less “sponsored” by my mechanic.)

DSC00295.jpg

As for the parts I pulled off it, did I end up putting them all back on?

February 26, 2019 /William Tjipto
NEWBIE, GUIDE, NEWBIEGUIDE, CAR, 車, 軽自動車, BUYING, JAPAN, 日本, 車検, SHAKEN, ADVICE, INSPECTION, JDM, SUZUKI, ALTO, ALTO WORKS, HA11S, KEI CAR, CAR LIFE, F6A, RHD, スズキ, アルト, アルトワークス, 自動車, RAYS, レイズ, VOLK RACING, VR, RSR
Cars, Japan, Ownership, Project Sachiel
3 Comments
DSC00242.JPG

[ Alto Works ] Sport-Service RSR Basic Coilover Suspension

January 22, 2019 by William Tjipto in Cars, Japan, Ownership, Project Sachiel

I am always looking to improve my car as simply and cheaply as possible. With my shaken due this past month in December, I have to replace the cut springs, as they are a “no-no” for the mandatory inspection (well, if it was discovered). And my mechanic is a strict guy so he highly recommended I change the suspension beforehand. Luckily my prayers for cheap, used parts came in the form of my friend who owned a 2003 Wagon R. As mentioned some months ago, we pulled off some Sport-Service RSR Basic Coilovers off his car when he brought it back to stock in order to sell it off. He offered it to me for a steal, so I couldn’t say no. Who knows if it could fit my older 1998 Alto, which is obviously a completely different body style, not to mention ride height? Would the suspension mount points fit or would it be too high compared to the smaller Alto?

My friend and I had this belief for some time that there is a huge number of parts sharing going on between the same manufacturer of kei cars. Suzuki, being arguably the leader in kei car sales, especially during that late 90s / early 2000s period, was prolifically producing a huge range of kei cars with minor cosmetic differences. With so much money that goes into R&D and tooling, it only made sense to change as little as possible to keep production costs low and share parts across their lineup.

2018-11-16 025.JPG

With that, I decided to try it out myself. The easiest part to access and replace would be the rear springs of the car, so started off with that. Lifting the car up, I can easily see that the rear springs and shocks are extremely similar in size with exactly the same mounting hole sizes, though the RSR shock tube width is a bit thicker.

2018-11-17 013.JPG

Let’s just say the top perch is absolutely a two-second drop-in fit, fitting snugly in the top rubber mount. We pulled it out for a quick cleanup and installed it, along with the two-second drop-in fit of the rear springs.

2018-11-17 014.JPG

It’s times like these I am so happy to have access to a lift, since dropping the car down, checking height, and readjusting as needed is a quick and painless procedure. After a few tries, we got the car at a very reasonable height for the upcoming shaken and for driving around town in the winter. This set the adjustable ring o the perch at about nearly two-thirds down the length of the body, affording plenty of lowering in the future.

2018-12-22 003.JPG

However, with the slightly wider coil diameter of the springs, the RSR shocks would definitely not be able to replace the stock Alto shocks without bumping or rubbing against the springs. As it sits now, its somewhat close, but definitely not an issue now. So unfortunately, the RSR rear shocks will have to collect dust somewhere, unused.

2018-12-09 012.JPG

Moving on to the front, we could immediately notice incredible similarities between the two front suspension struts. Kei car front suspensions are wonderfully easy to remove. With only two lower bolts, two upper hat nuts, and a clip for the brake hose, swapping the struts was a pleasant task. (Plus with all that experience I got from cutting the springs and fitting them, I was quite well versed.) Literally ten minutes later, both struts were installed and final tightening adjustments were made. The one very minor difference between the two struts were the brake hose attachment points.

2018-12-09 010.JPG

We lowered the car and… voila! A perfect ride height and a near perfect fit. I was surprised that no ride height adjustment was needed, since Wagon Rs typically rides higher than Altos. (My friend’s Wagon R was nearly slammed to the ground, I guess.)

DSC_2691.JPG

As a bonus, there is noticeable negative camber on the front wheels now. This camber should aid a bit in hard cornering, as when the car’s weight in thrown into one of these front wheels, more of the tire is flat on the ground, increasing grip. Conversely, when the car has neutral camber as it did before, the geometry change when weight is applied in the corner will decrease grip with positive camber. This is especially important in a front-driven car with a majority of the weight riding on its front wheels.

Not that I have particularly noticed it yet. Driving on winter tires in the cold winter really does not show the capabilities of the new suspension setup, but I will say the car is feeling a lot stiffer on bumps, but with a much more controlled bounce than the haphazardly cut suspension previously. The on-center feel is much lighter than before and the car is eager to turn. As I get more experience with it, I’ll update my review on it later.

DSC_2688.JPG

Of course, the most important benefit of all this suspension change is that the car is looking more gorgeous than ever before. Maybe driving around this winter won’t be so terrible, after all.

January 22, 2019 /William Tjipto
JAPAN, JDM, SUZUKI, ALTO, ALTO WORKS, HA11S, CAR, KEI CAR, CAR LIFE, F6A, RHD, スズキ, アルト, アルトワークス, 自動車, 軽自動車, 日本, 車, RAYS, レイズ, VOLK RACING, VR, rsr
Cars, Japan, Ownership, Project Sachiel
2 Comments
  • Newer
  • Older

Powered by Squarespace