Ready Seat Belt

レディー・シート・ベルト

A look into the cool and bizarre, focusing on the Japanese import car culture and delicious ramen. Updated weekly.

  • Home
  • Blog
  • Food
  • Archive
    • Complete Archive
    • Ramen Archive & Map
    • Suzuki Alto Works HA11S
    • Suzuki Alto Works HA12S (Scrapped)
    • Suzuki Swift Sport ZC31S (Sold)
    • Suzuki Wagon R MC22 (Scrapped)
    • Newbie Guide
    • Photography
  • About
  • Facebook
  • Instagram
  • Twitter
DSC_5519.JPG

Prince and Skyline Museum (プリンス&スカイラインミュウジアム) in Okaya, Nagano

March 19, 2020 by William Tjipto in Cars, Japan, Reviews

The same weekend I attended the MX-5 Roadster Karuizawa Meeting, I wanted to make it a point to check out the Prince and Skyline Museum located in Okaya, Nagano Prefecture. Driving from Fukui, it took quite a bit of my day to get there, but I made it with plenty of time before they closed at 5.

A family park and small amusement area with several parking lots surrounds the grounds where the museum is located. From the main parking lot, only a small sign pointed the way up the hill. The building itself only had two signs that hinted at the treasures inside.

DSC_5520.JPG

Entry was a reasonable 1000¥ and the first floor housed a gift shop and a single car.

2017-05-27 006.JPG

Despite walking down a flight of steps in the basement, it was as if the sky line opened up before me. Immediately, I could feel a sense of childlike wonderment envelop me as I strolled through the densely packed room of Nissans. Here I was, practically alone in this whole room all to myself (with merely a couple, their child, and a staff member wandering about briefly). 

DSC_5526.JPG
DSC_5528.JPG

The first area was lined with display cases of replica scaled cars, a few parts, magazines, manuals, and other paraphernalia.

DSC_5569.JPG
DSC_5546.JPG

The front had these beautiful, immediately recognizable Nissans.

DSC_5532.JPG
DSC_5619.JPG

The right side and left sides of the museum housed pristine examples of historic Nissans.

DSC_5630.JPG

Toward the back wall sat these gorgeous beauties.

DSC_5559.JPG

So, any chance I can drive these home?

DSC_5605.JPG

According to a staff member, some of the cars are rotated out, so selection of cars will vary depending on when you visit. Also to note, the museum is closed in the winter months from November to March.

2017-05-27 010.JPG

Prince and Skyline Museum

www.prince-skyline.com

Find local businesses, view maps and get driving directions in Google Maps.

March 19, 2020 /William Tjipto
PRINCE, SKYLINE, NISSAN, NAGANO, GTR, AWD, TURBO, MUSEUM, RACECAR, SPORTSCAR, JDM, JAPANESECARS, JAPAN, RHD, CAR, CARLIFE, READYSEATBELT, プリンス, プリンス自動車工業, 日産, スカイライン, 長野, 博物館, 軽自動車, スポーツカー, 日本, 車, 愛車
Cars, Japan, Reviews
Comment
DSC09657.JPG

[ Alto Works ] Front Chin Lip Spoiler, Part 2 (Front Bumper Modification, Part 3B)

February 11, 2020 by William Tjipto in Cars, Japan, Ownership, Project Sachiel
2020-01-19 002.JPG

After one coat of black paint to at least hide the white FRP backing, I set out to refinish the lip. Unfortunately, FRP is a material that requires a bit of care if you want good results and, most importantly, to be safe.

DSC09187.JPG

(This is one of the few times I have ever worked on FRP, so I don’t know much about what I’m doing. Please forgive my process if it is not up to par and feel free to comment below.)

Fiber-Reinforced Plastic, especially found on aftermarket automobile parts, is a plastic compound mixed with glass fibers to increase rigidity and durability. It is arguably lighter and stiffer structurally than than ABS parts, but the stiffness of FRP often results in cracks when a strong impact to the plastic is applied. The finished results are also very rough, requiring a lot of labor-intensive work for the end user or installer since the finish is so crude. But since these parts are so much cheaper and easier to make, most aftermarket parts are made of this material.

Worse yet, the biggest issue working with fiberglass is safety. Since glass fibers are so light, thin, and nearly microscopic, they often can be breathed in and cause irritation of the lungs. Even the slightest bit of loose fiberglass on the skin can cause irritation that lasts for days. Working with FRP necessitates proper breathing apparatus, eye protection, and skin protection.

IMG_2761.jpg

A few years ago, I installed a carbon fiber Ralliart lip onto my Evo which required some drilling and modification to fit properly. Thankfully, I was used to working with the minimum protection of eyewear and some light gloves, but at that time I was woefully unaware of the caution necessary with working on fibrous materials. This resulted in my arms having a nice itchy, stinging feeling for a few days afterwards. Hopefully I didn’t breathe in too much of the crap.
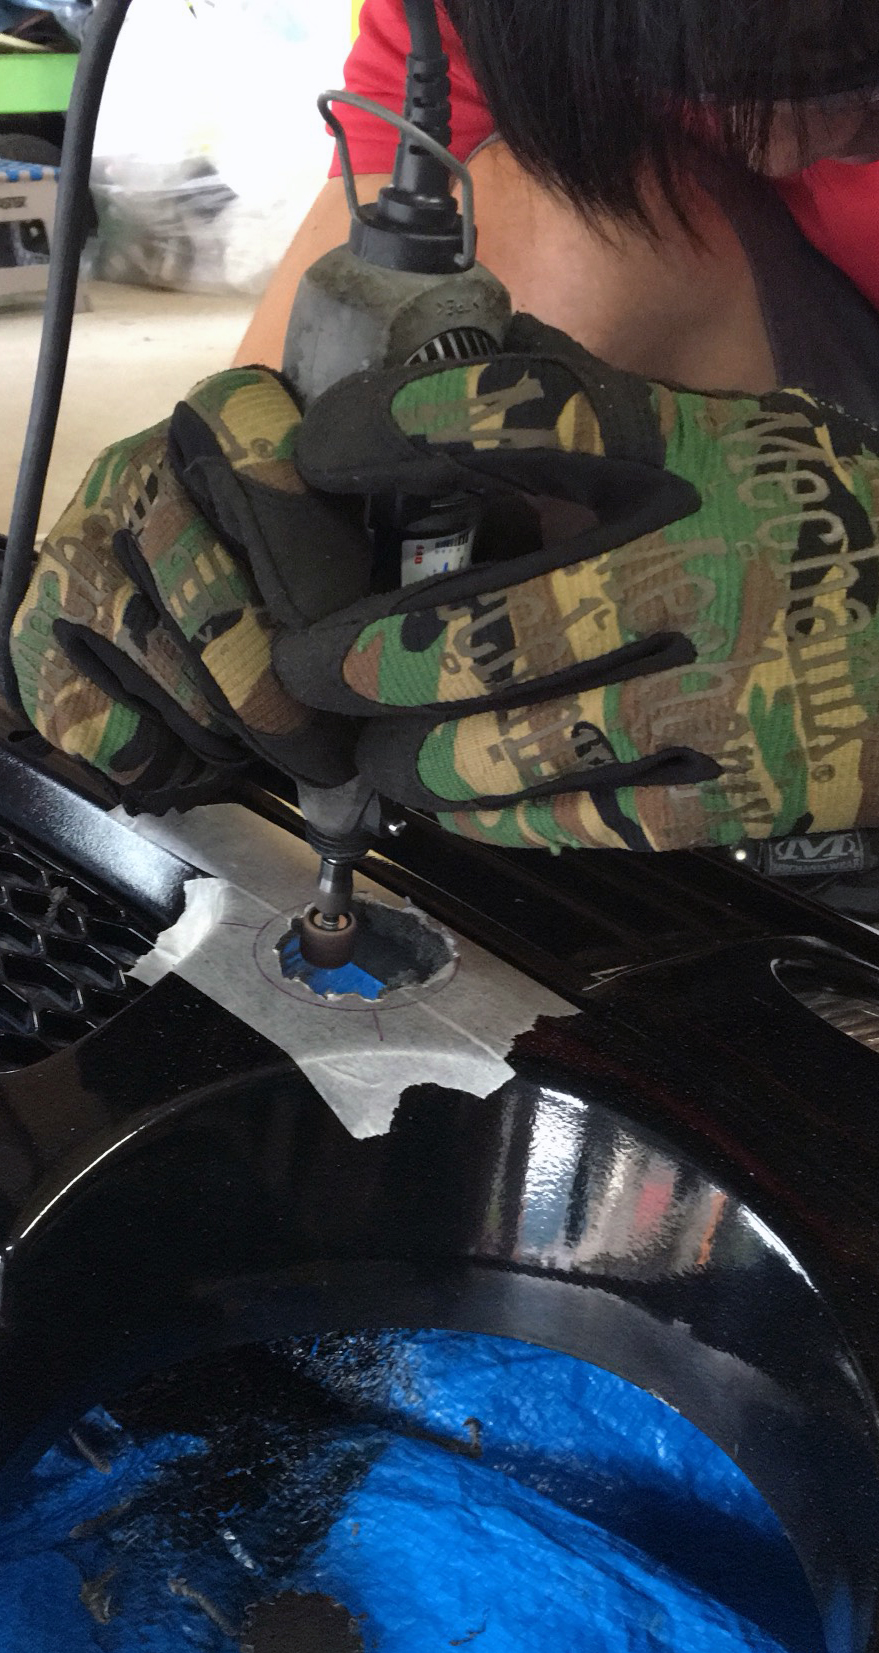
For this spoiler, I will not need to do significant work or modifications other than some light sanding and hole drilling for mounting, but I do have all the necessary protection. I picked up this 3M P100 Particulate Mask, fully-sealed AOSafety goggles, and 3M full suit awhile ago for use on exactly these type of projects. I first used the mask and goggles on my hood vent cuts, though I have yet to use the full suit.

DSC09189.JPG

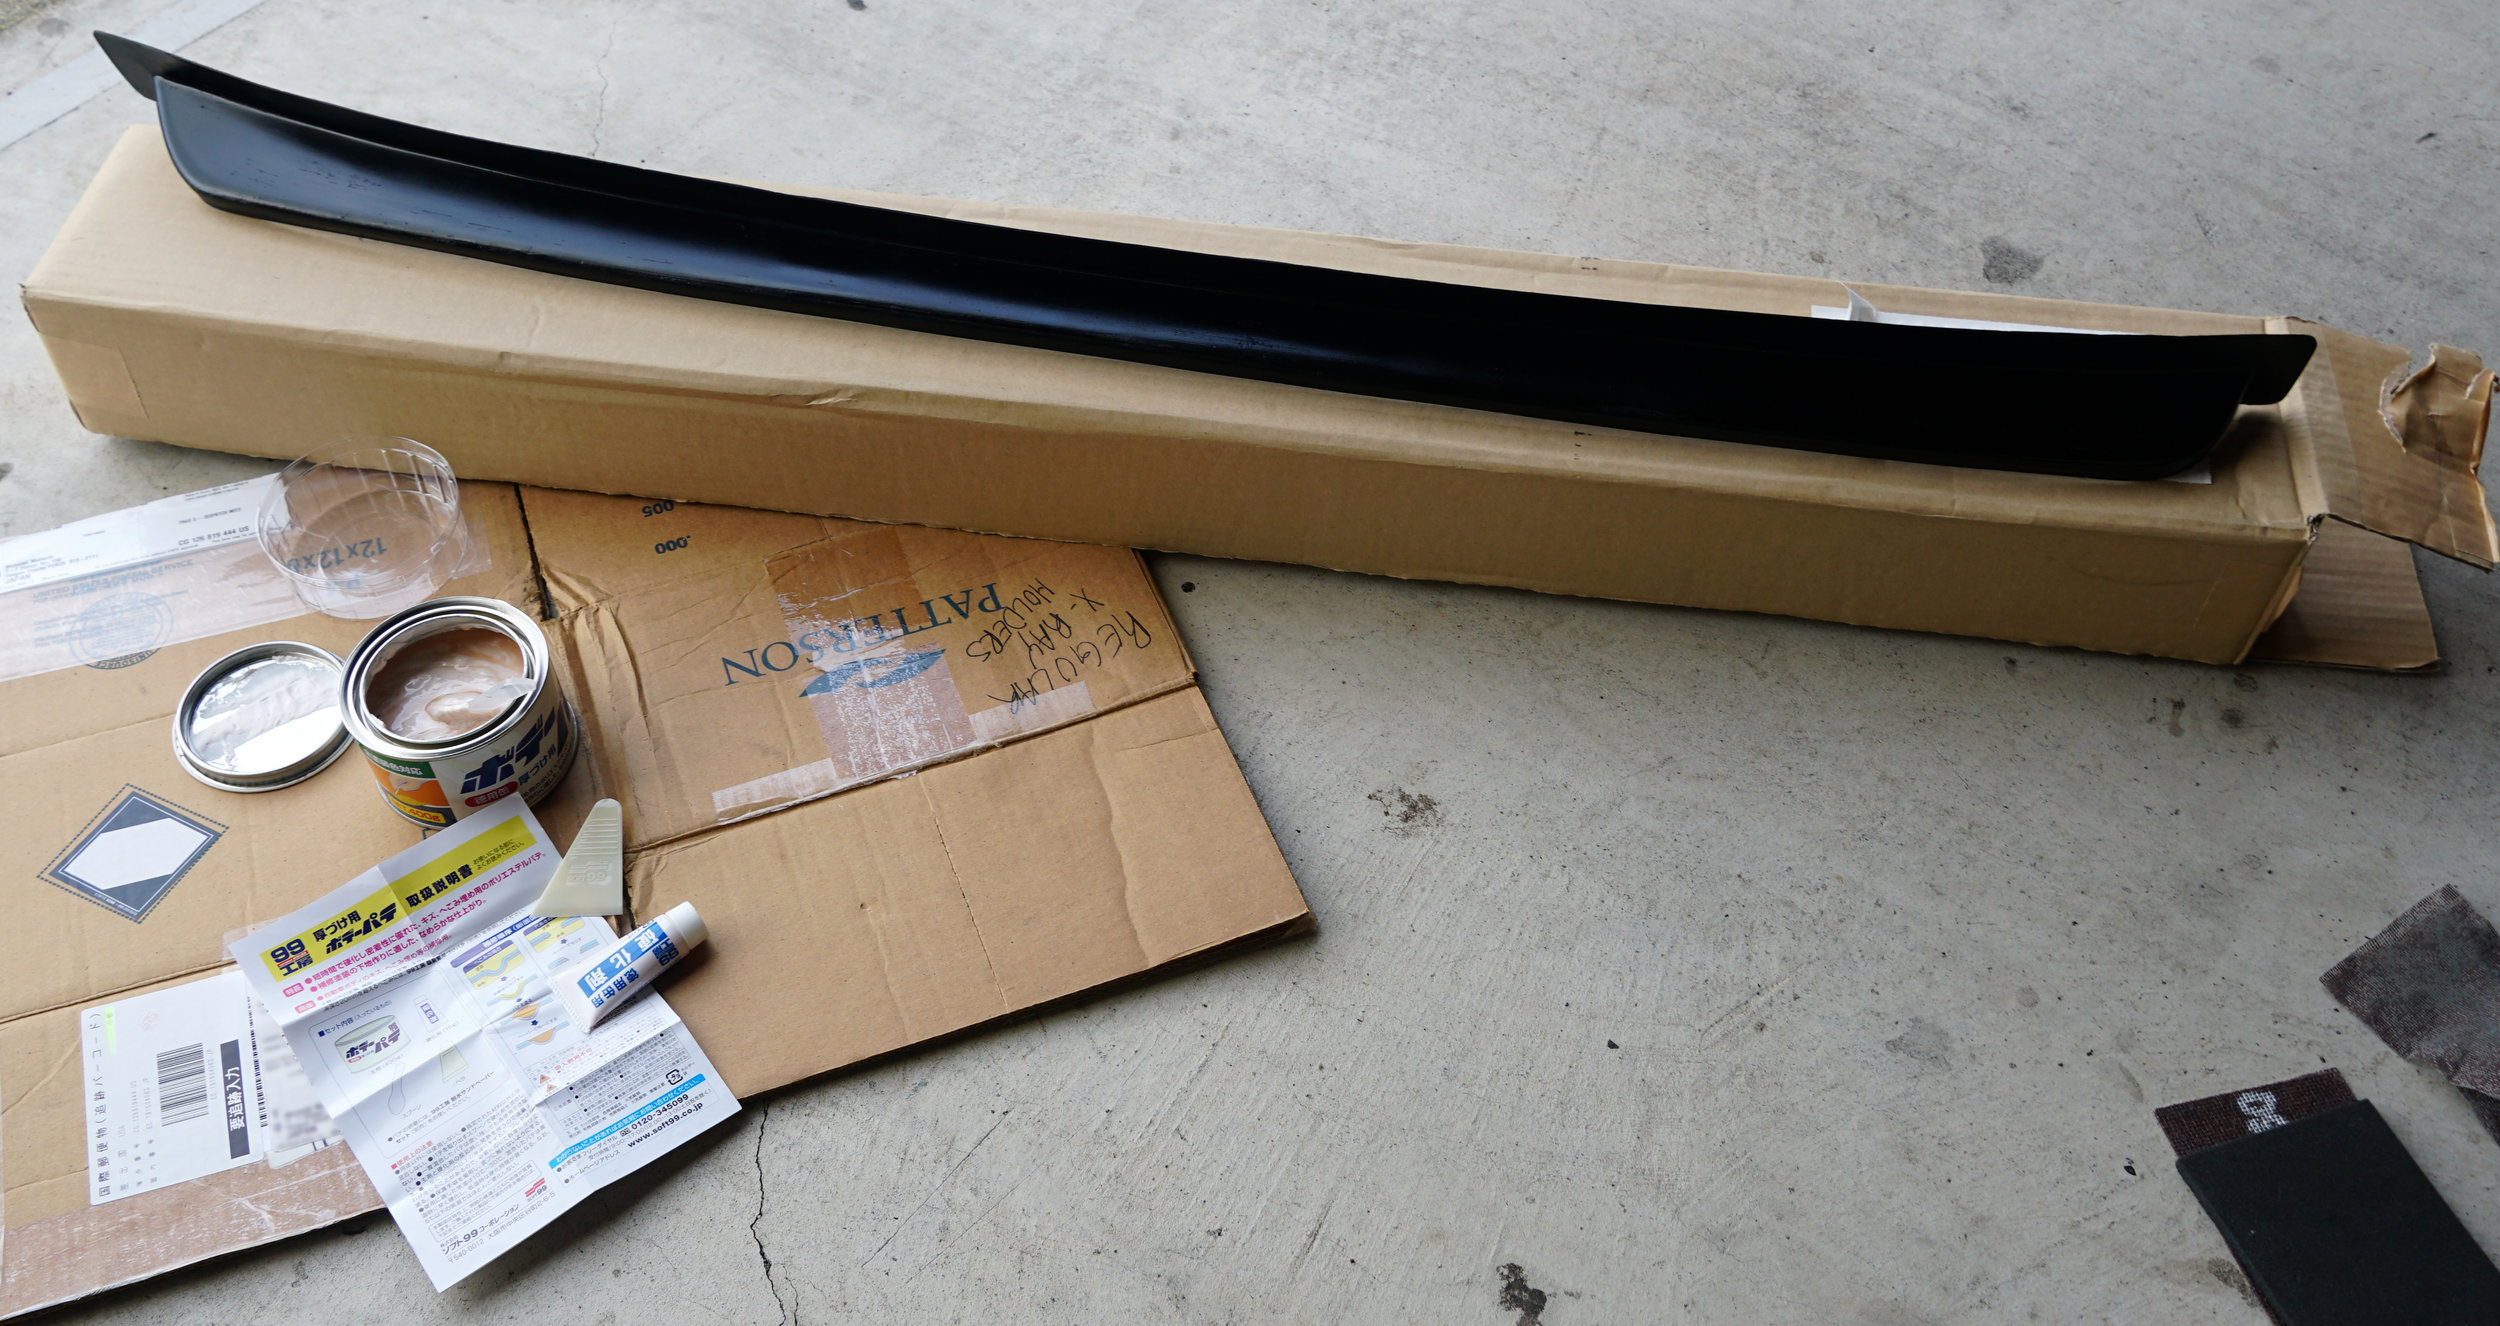
For surface finishing, I was recommended this Soft99 Fine Filler off Amazon for 1432¥ ($13 USD). It comes with epoxy hardener to cure the putty to touch in about half an hour when mixed properly. It mixes easily and went on pretty smooth, like a creamy peanut butter spread. This made working with it much easier than I had expected.

DSC09192.JPG

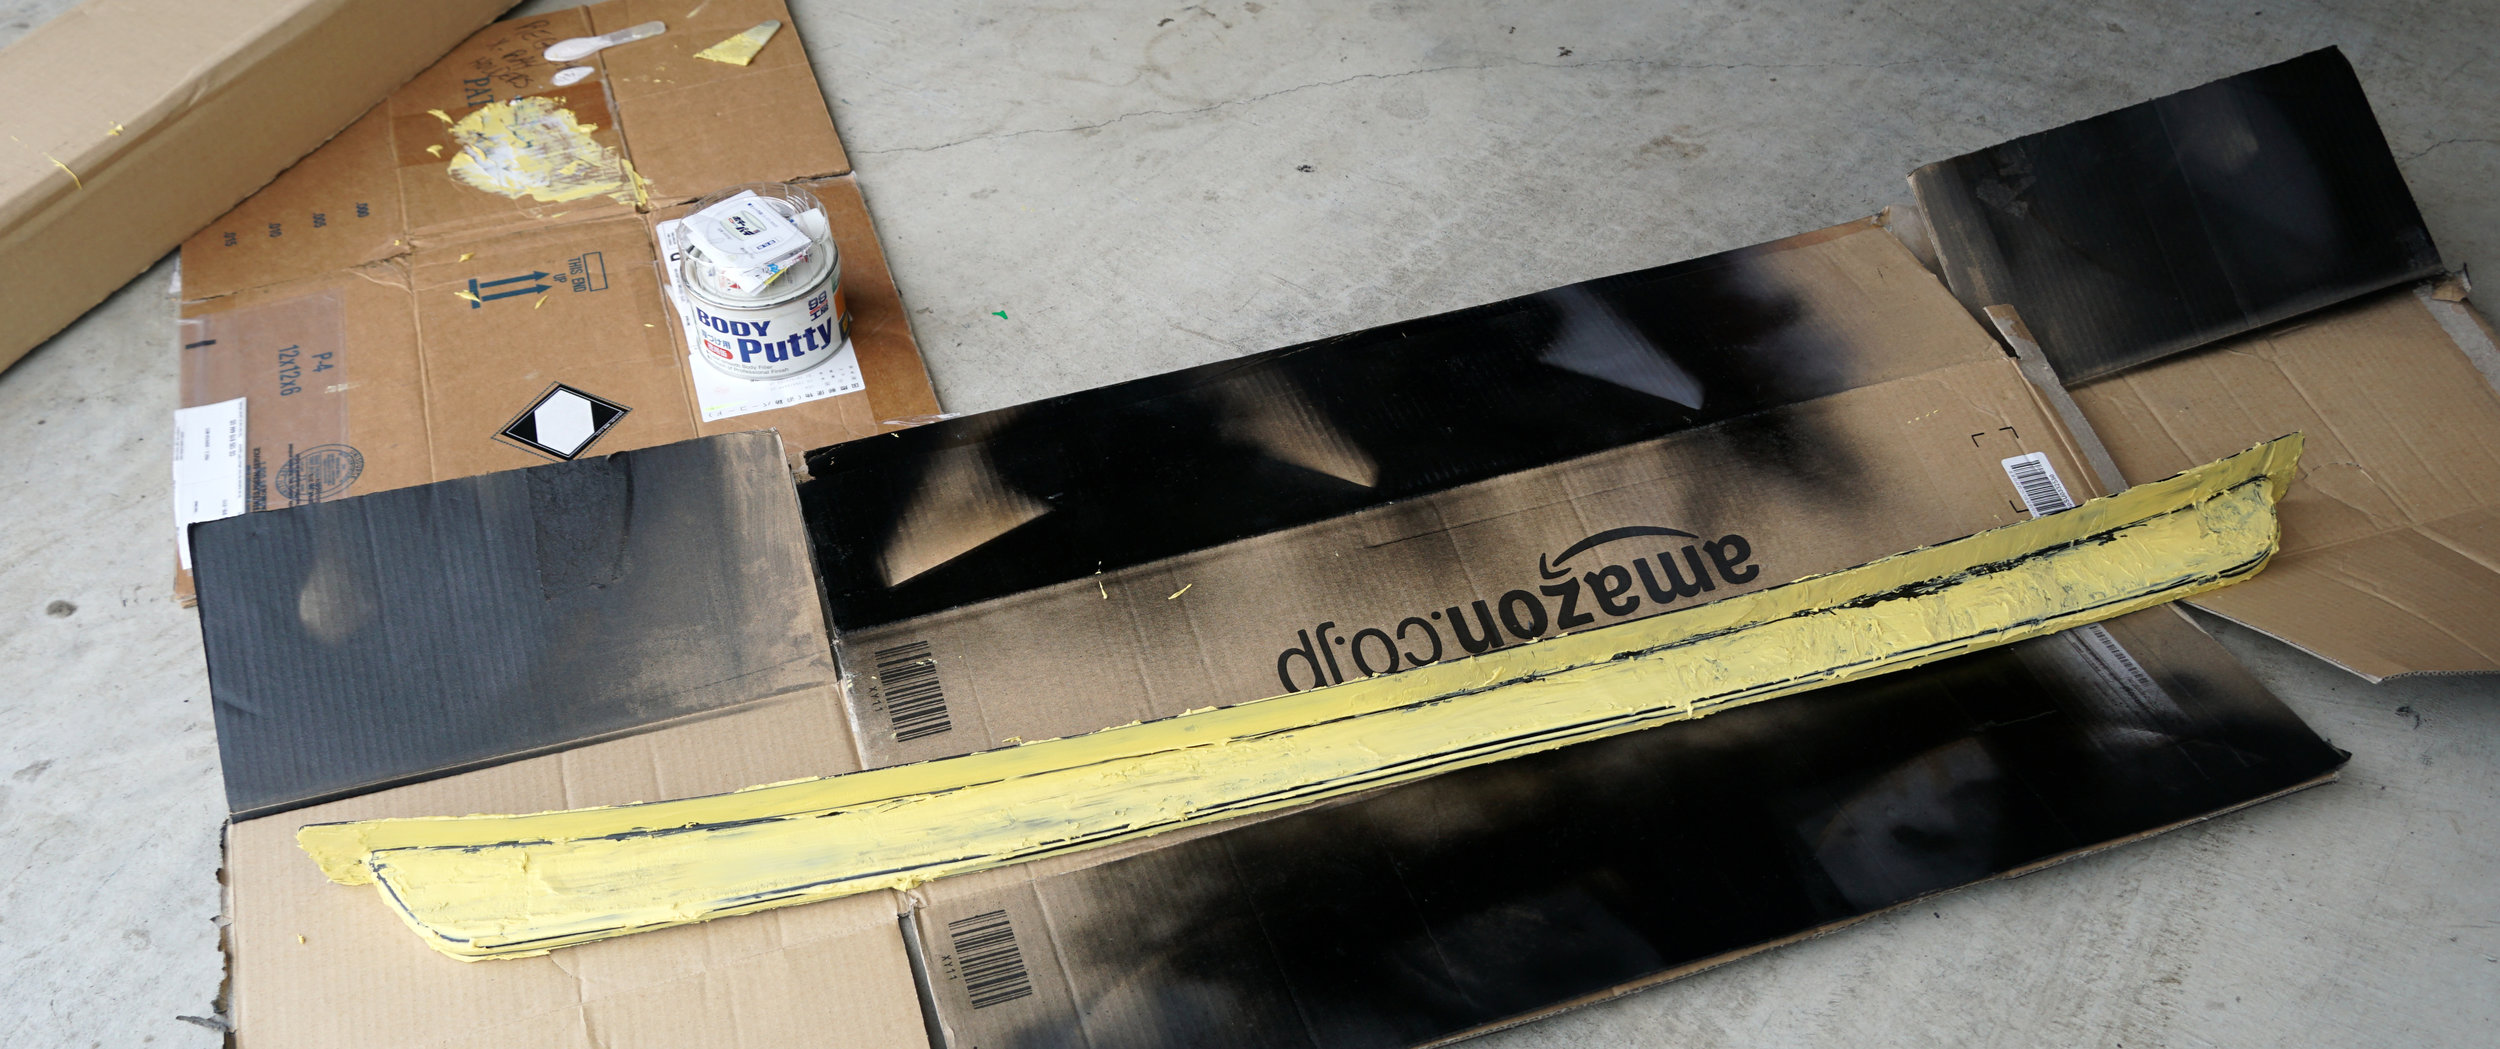
Once the lip had plenty of time to cure (and the fact I didn’t have time til a week later to continue), I could start to sand down the whole lip.

DSC09203.JPG

Even though I don’t need it absolutely perfect, I did my best to make sure it would look good if anyone were to inspect it fairly closely. The putty was extremely easy to sand down and even the yellow color made it easy to see where I needed to continue to refinish.

DSC09208.JPG

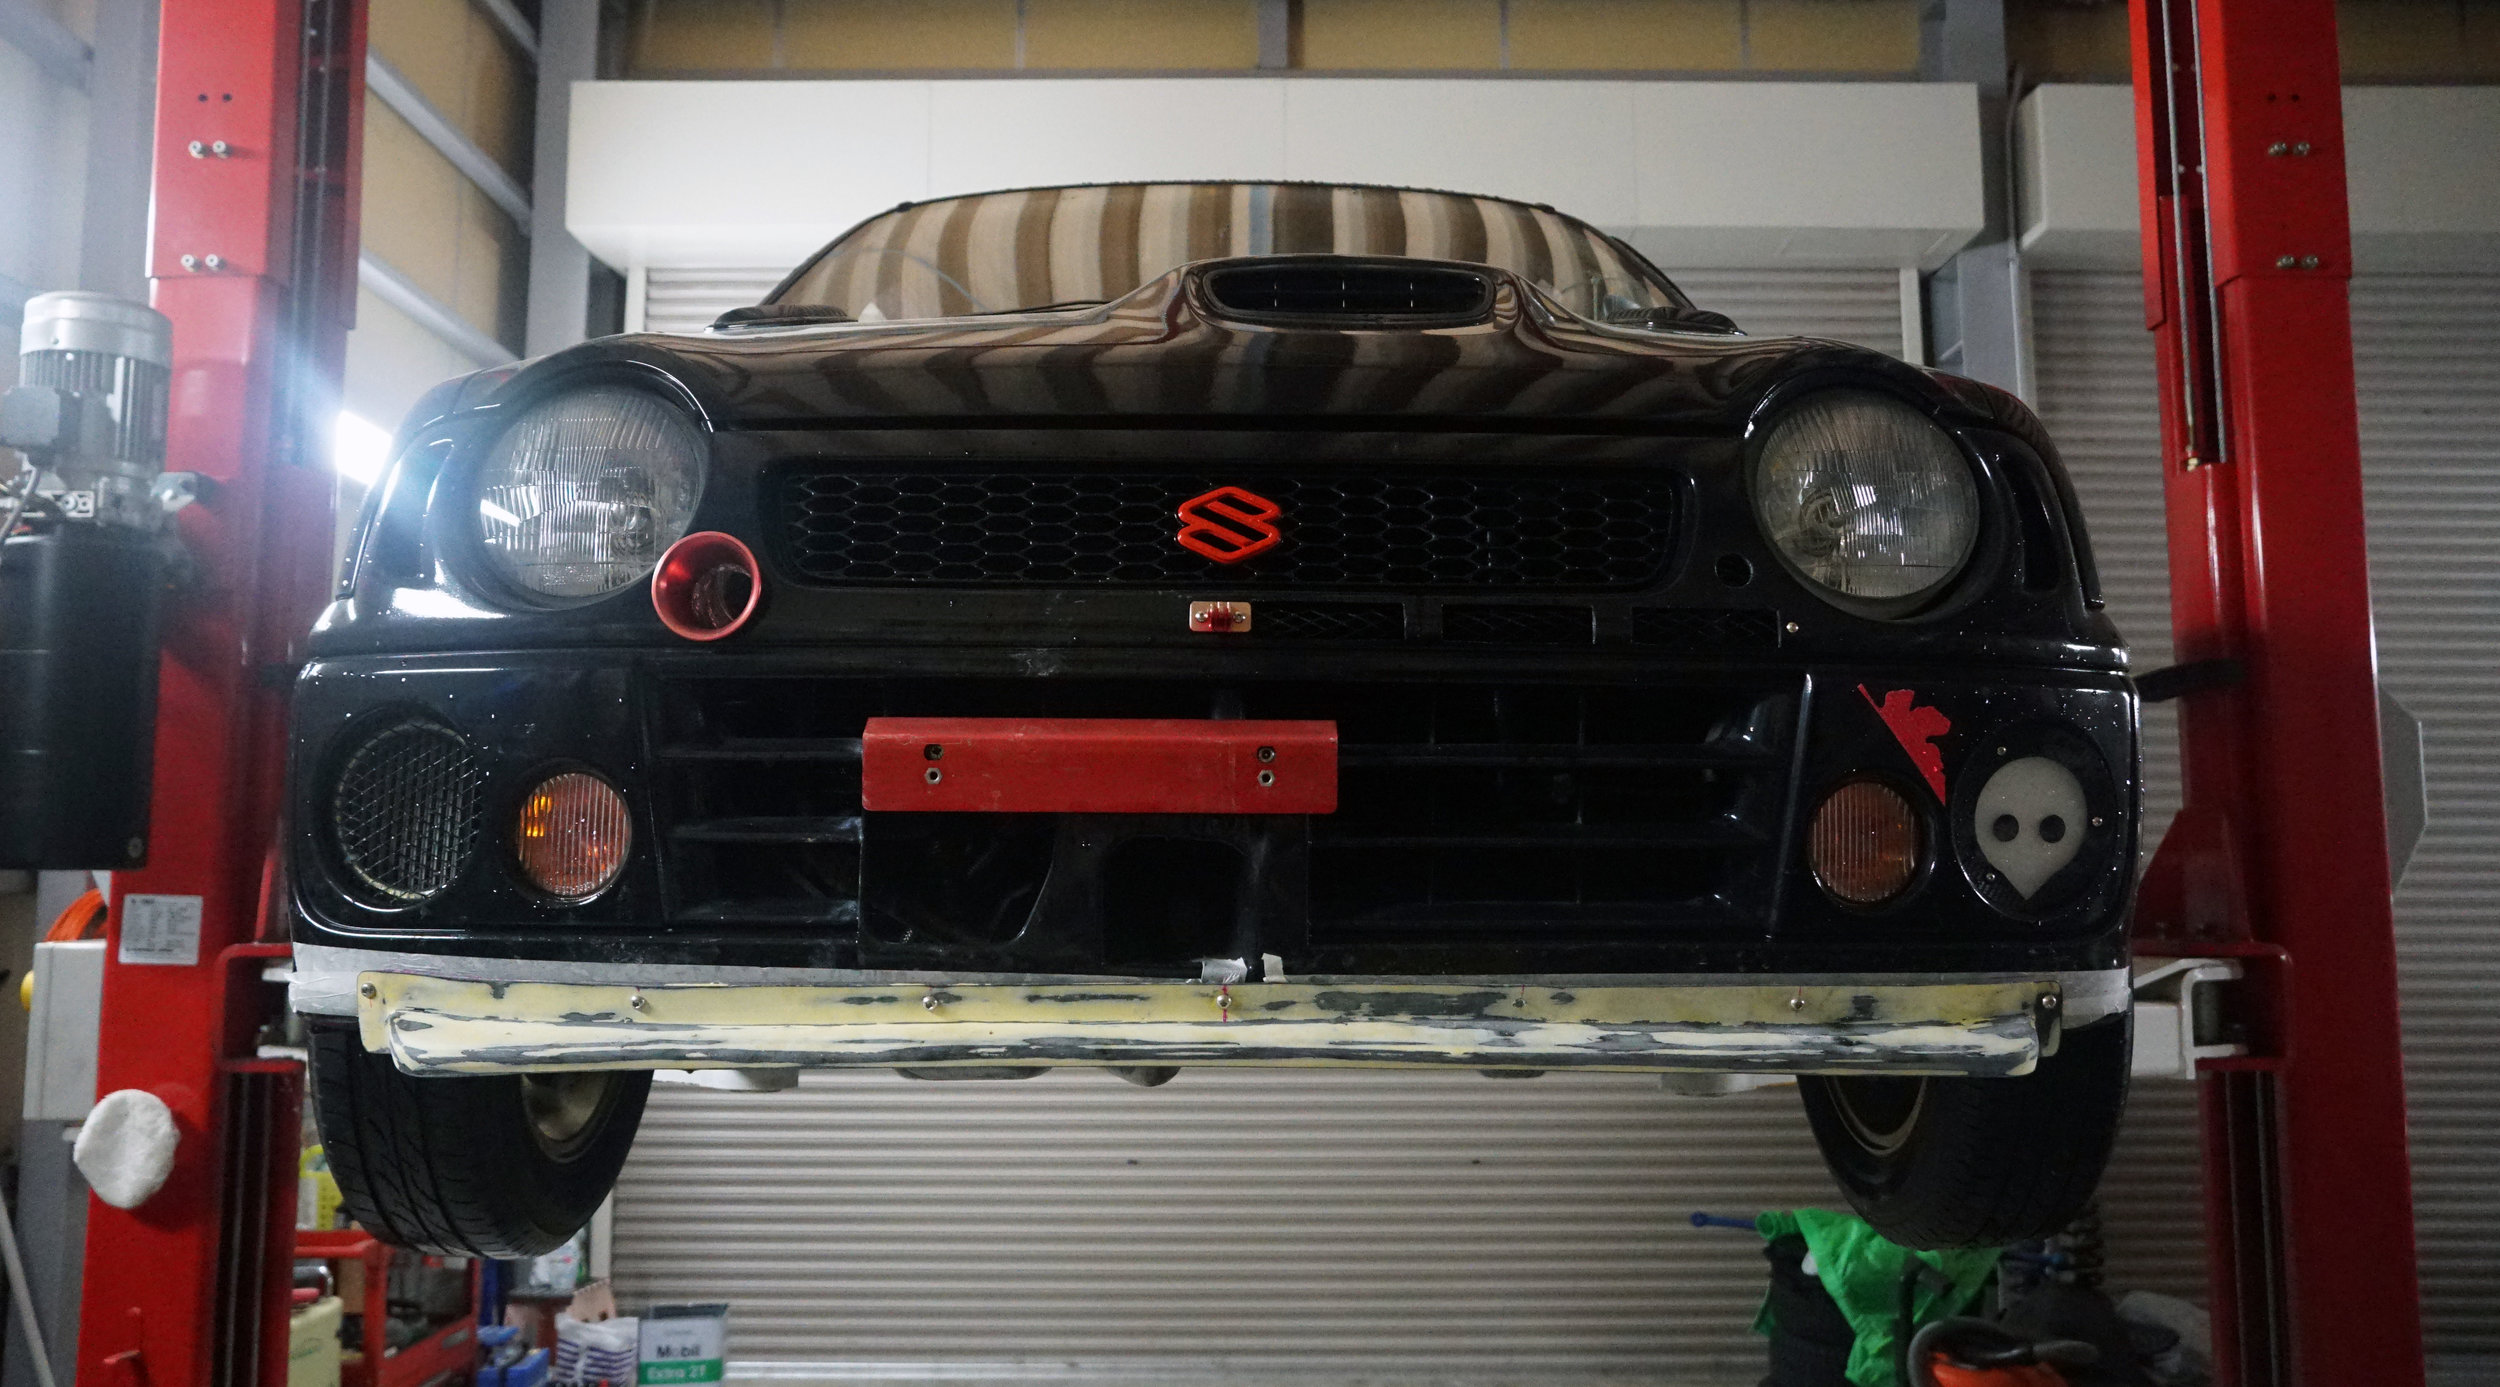
Once it came time to get to mounting, I had a few decisions to make regarding where exactly to mount the lip. While I would like the flat backing to be flush up against the lower front bumper, there was a few issues. First of all, it would actually end up raising the forward angle of the lip a bit based on the taper. In addition, while you can’t actually see it, the rear backside of the bumper only has some areas where a bolt could potentially mount. Lastly, I wanted the lip to be as low as possible, since the oil cooler I installed a while back is actually lower by a few centimeters than the bumper. This means if I were to hit a concrete block, for example, it would scrape the lip first rather than the cooler.

DSC09204.JPG

I decided to use 7 M6 button head screws, spaced evenly along the backing of the lip. I think this actually looks pretty good. Note one screw has not been installed because drilling it could potentially damage one of the air conditioner hoses so it will wait until the bumper comes off during final install

I am seriously getting annoyed at all these rainy weekends. Weekend after weekend have almost all been rainy, leading up to Hagibis, Typhoon Number 19, hitting Japan on a three-day weekend in mid-October. Can I even get the lip painted before the winter sets in?

DSC09643.jpg

Finally, the drier fall has set in Japan and I found some good timing to put on the lip, along with a set of LED H4 bulbs to replace the older HIDs I had in it.

DSC09646.JPG

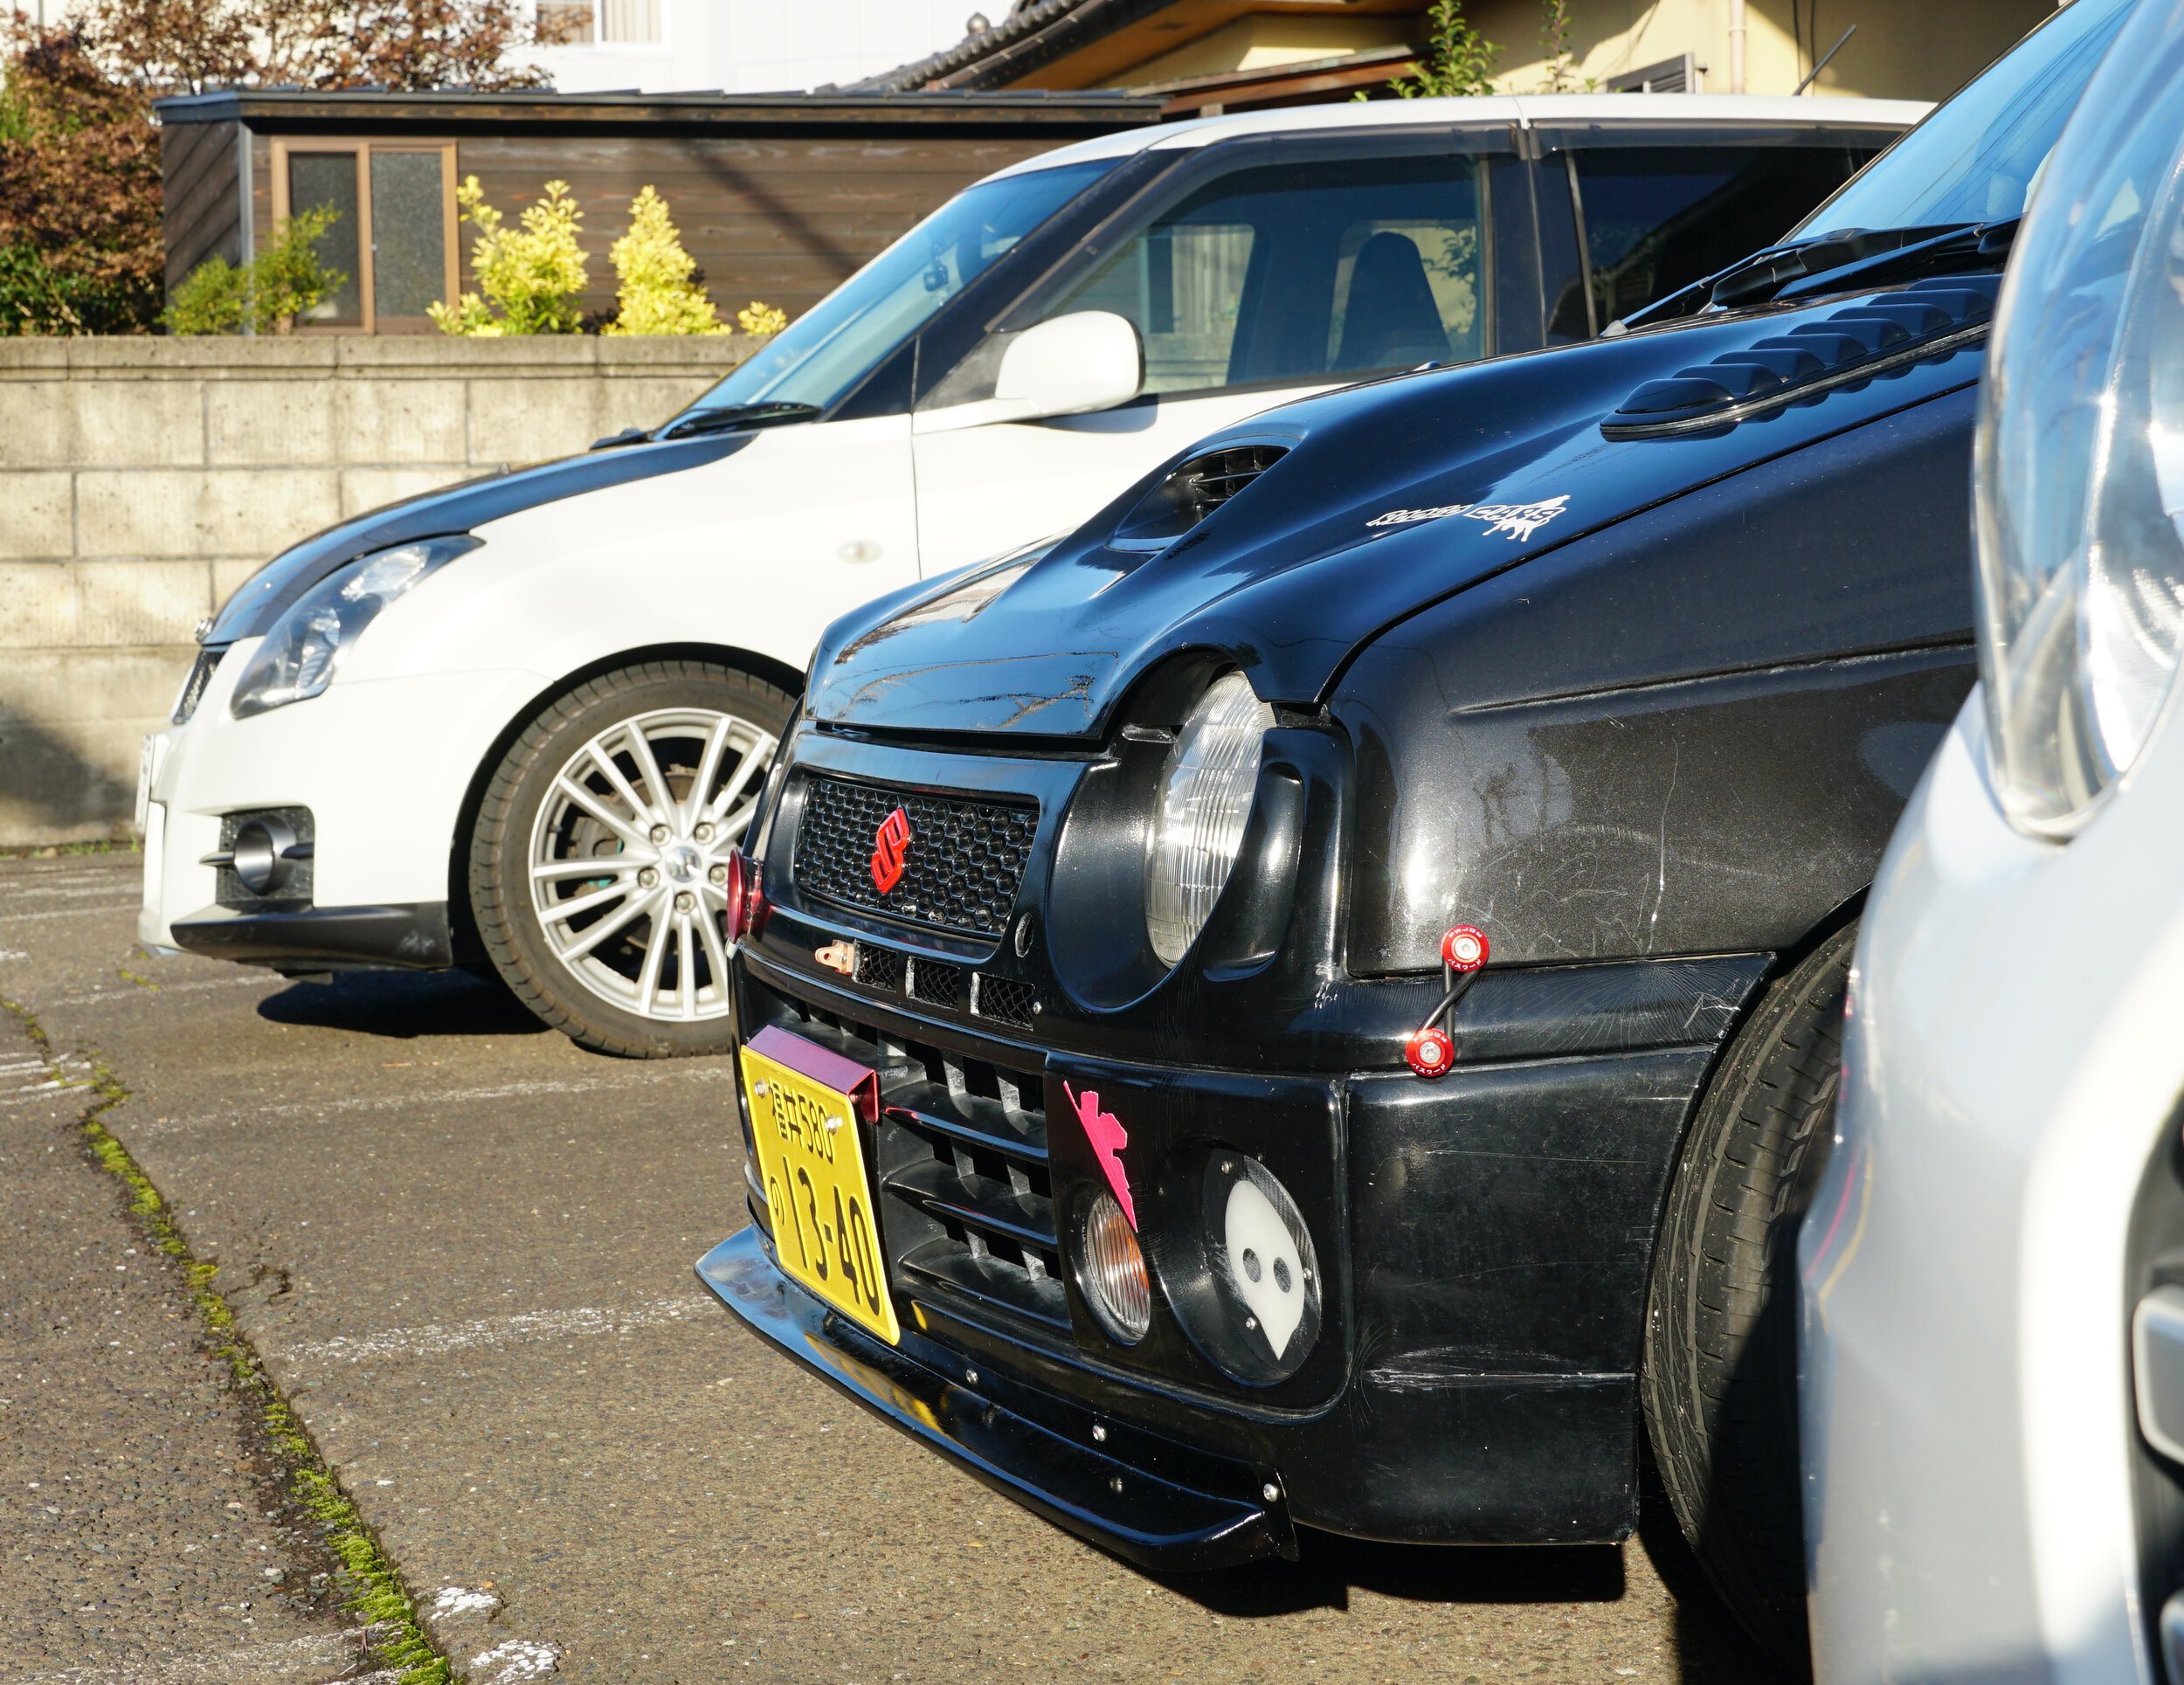
I wish I had more time to perfect the finish of the paint, but with the poor, colder weather of late, I thought this would be good enough for this season. Nonetheless, it still looks great from a few feet away!

DSC09648.JPG

The lip is small and subtle, but definitely adds a lot of character to the front of the car, making it look a bit more aggressive and somehow wider. I am actually quite happy with the placement of the lip and how it looks on the car.

I will admit that if I were to do it all over again, however, I would definitely put on a lip that is much wider and longer. Maybe that could be another project for the future!

February 11, 2020 /William Tjipto
JAPAN, JDM, SUZUKI, ALTO, ALTO WORKS, HA11S, CAR, KEI CAR, CAR LIFE, F6A, RHD, スズキ, アルト, アルトワークス, 自動車, 軽自動車, 日本, 車, AERO, エアロ, CHINSPOILER, SPOILER, LIP, リップスポイラー, フロントリップスポイラー, スポイラー
Cars, Japan, Ownership, Project Sachiel
2 Comments
DSC00219.JPG

[ Alto Works ] Front Chin Lip Spoiler, Part 1 (Front Bumper Modification, Part 3A)

February 05, 2020 by William Tjipto in Cars, Japan, Ownership, Project Sachiel

There is no shortage of aftermarket add-ons that supposedly enhance the visual appeal of a car. Body kits, stickers, covers, and accessories can transform a daily driver to a race car… or a ricer. My Alto Works came from an era when boxy, over-the-top aftermarket body kits were the norm so there are still plenty of weird, flamboyant aero parts available for the car. Most of it, unfortunately, doesn’t fit with the theme of the whole car… to me, at least.

DSC_3584.JPG

Front lip spoilers are one of those small little bits that can make a difference in the overall look. A simple lip can transform a boring car to something sporty by reducing ground clearance and adding a hint of aggressiveness. It’s like wearing a little extra accessory, be it a tie, a wristwatch, a necklace; subtle, but really adds to the atmosphere.

DSC_0066.JPG

Of course, there are pragmatic reasons for adding a front lip spoiler, too. As the name implies, it can also act as an air spoiler, increasing downforce and minimizing underbody air pressure. Larger front lips look very similar to wedges, forcing air over it, pushing the front of the car down for maximum grip.

DSC_0855.JPG

In addition to front lip spoilers, proper racing aero often employs other tricks to improve lap times. Those long flat boards that poke far past the bumper, often secured by additional tie rods, are called air splitters. They are designed to literally “split” the air above and below, cutting the lower air pressure, but the most effective ones are long and extremely low to the ground. While a simple front lip spoiler alone may not be effective as a true splitter, it can certainly help without making a car impractical as a daily driver. 

2016-02-14 043.JPG

Rather than go full-bore into a splitter and huge front lip, I’m sticking with something simpler and better looking for now. I always liked the classic look of a flat, broad lip, as found on retro-fantastic muscle cars and Datsuns of old. Essentially a thin wedge angled downwards and attached to the stock bumper, they were popular additions in a bygone era. Also referred to chin spoilers, in Japanese they often seem to be commonly differentiated from other lip spoilers.

DSC_3852.JPG

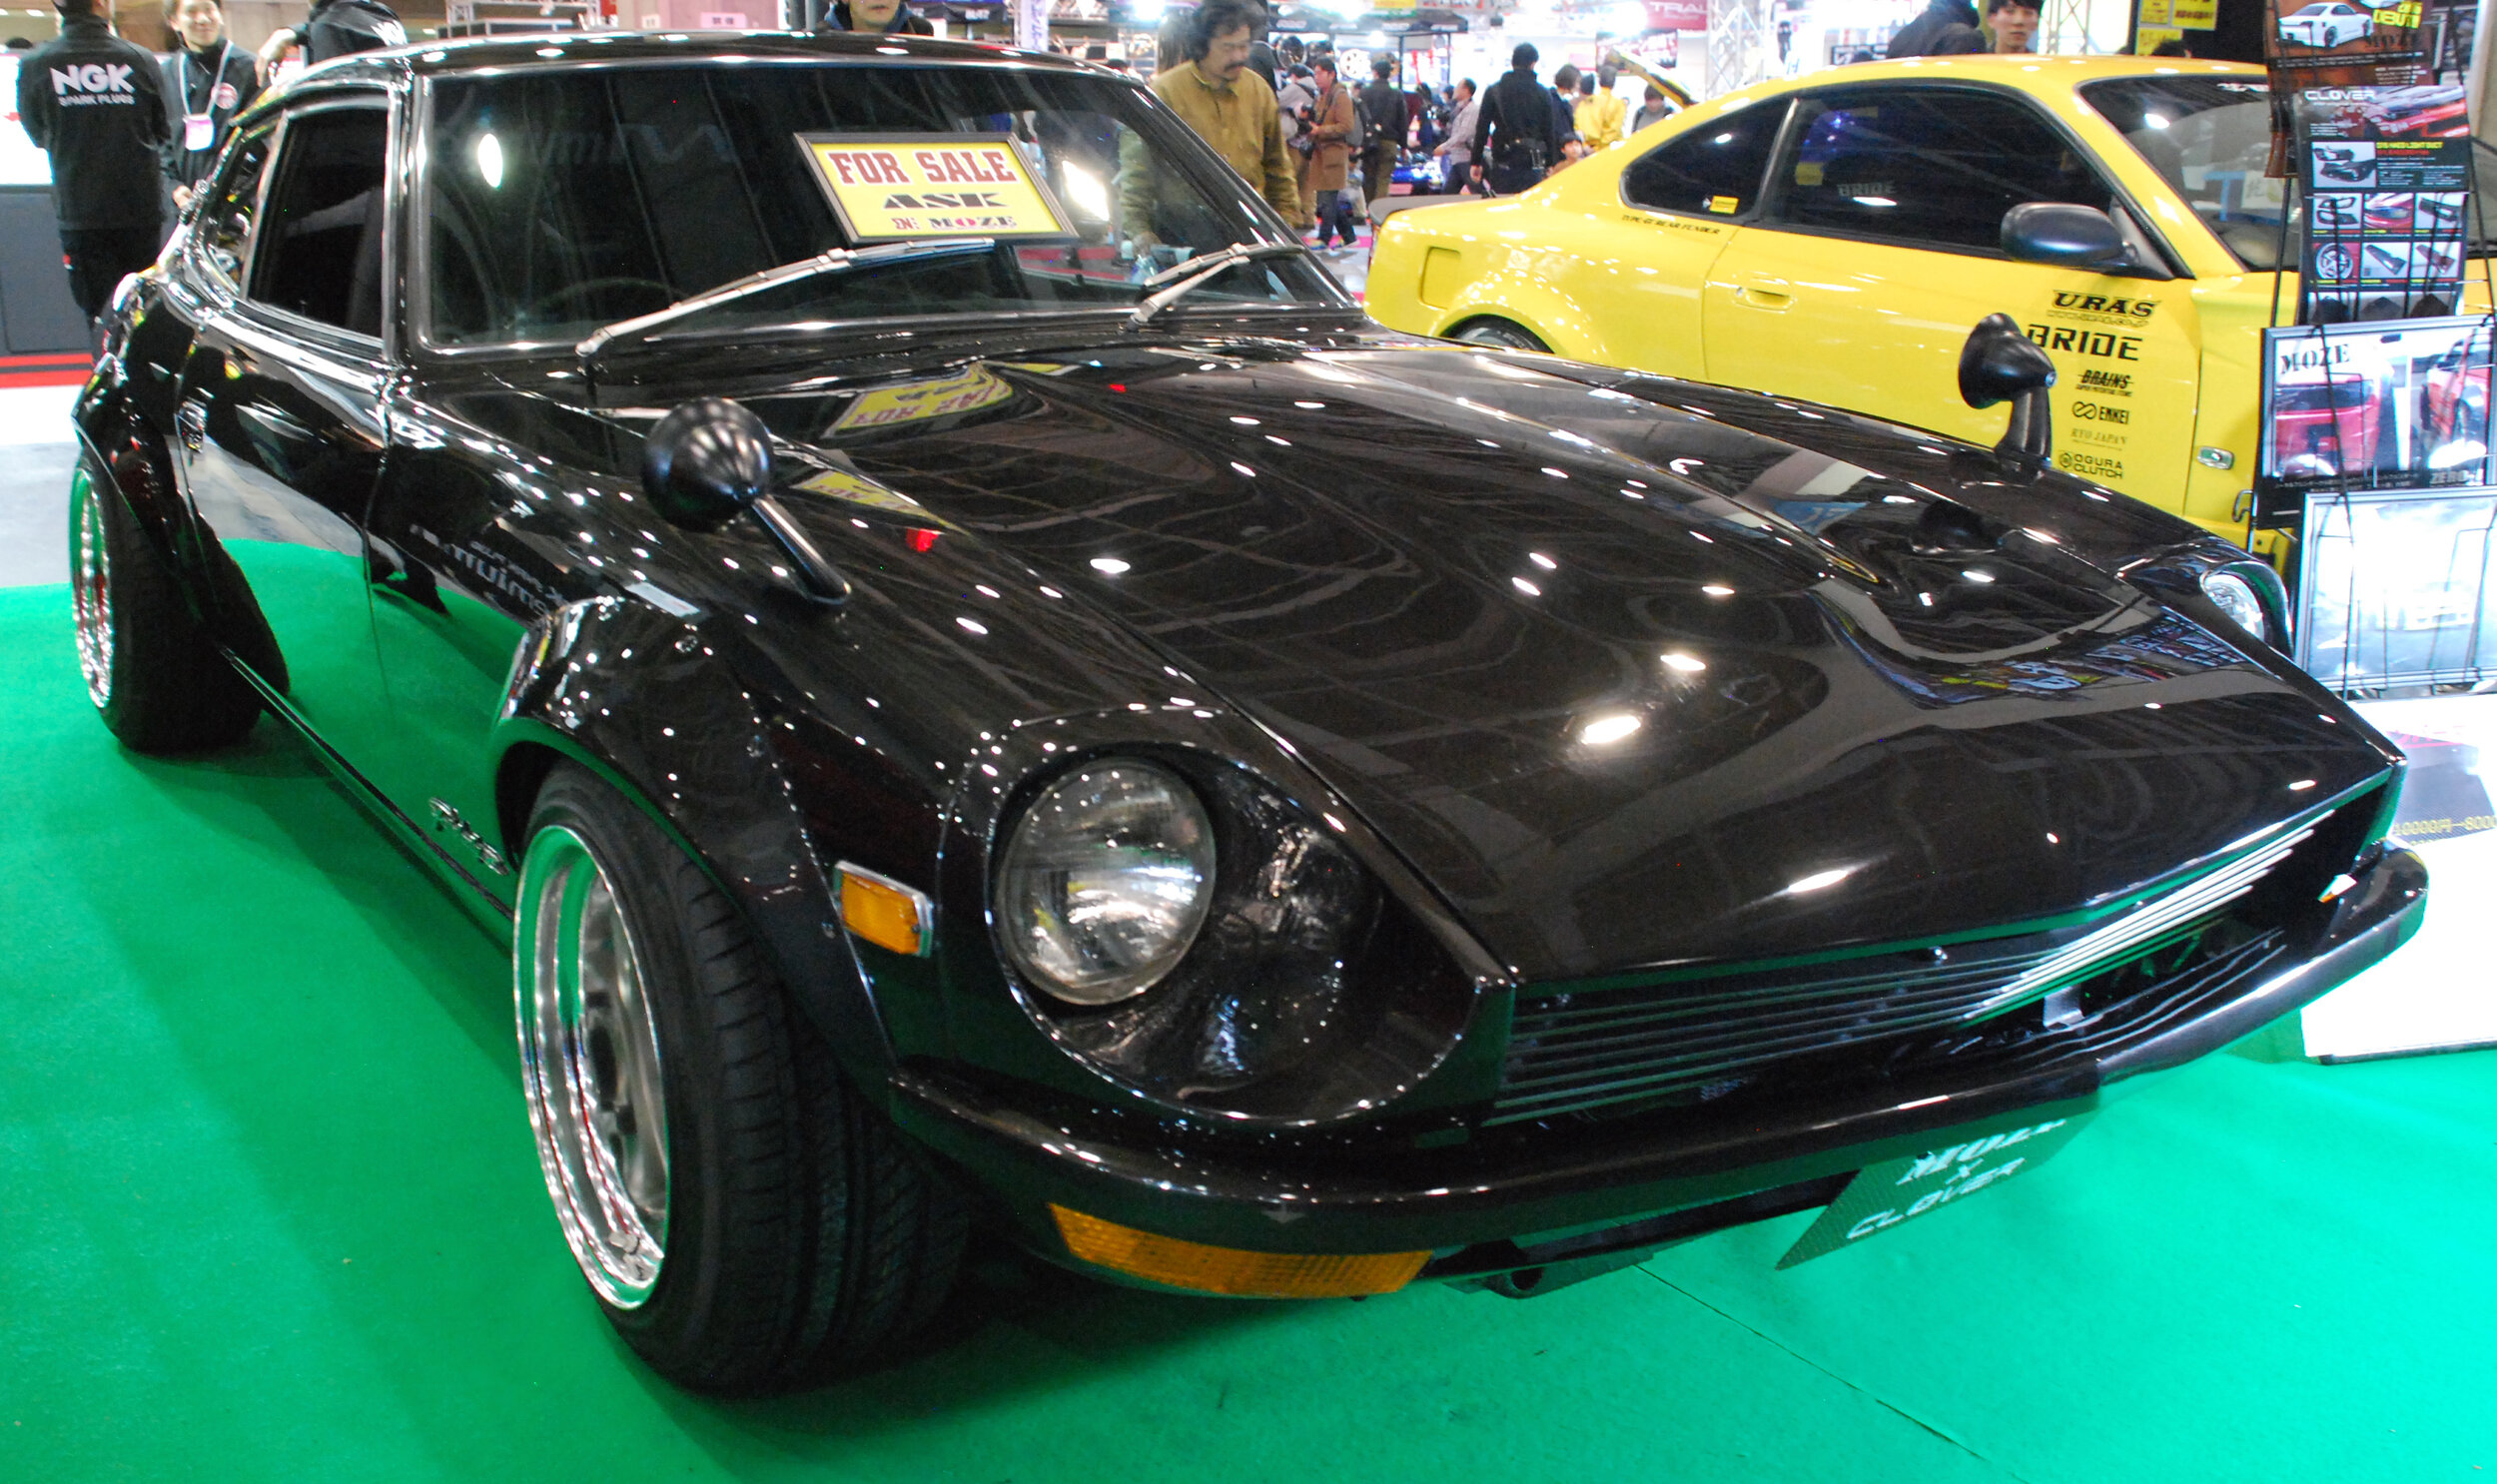
Ever since I bought my Miata years ago, I always wanted to get one of these chin spoilers for it, but they were a bit pricey with shipping from Japan. The only ones I’ve seen that are available now are from TRAP and they are gorgeous on a Roadster with other retro modifications.

DSC_0497.JPG

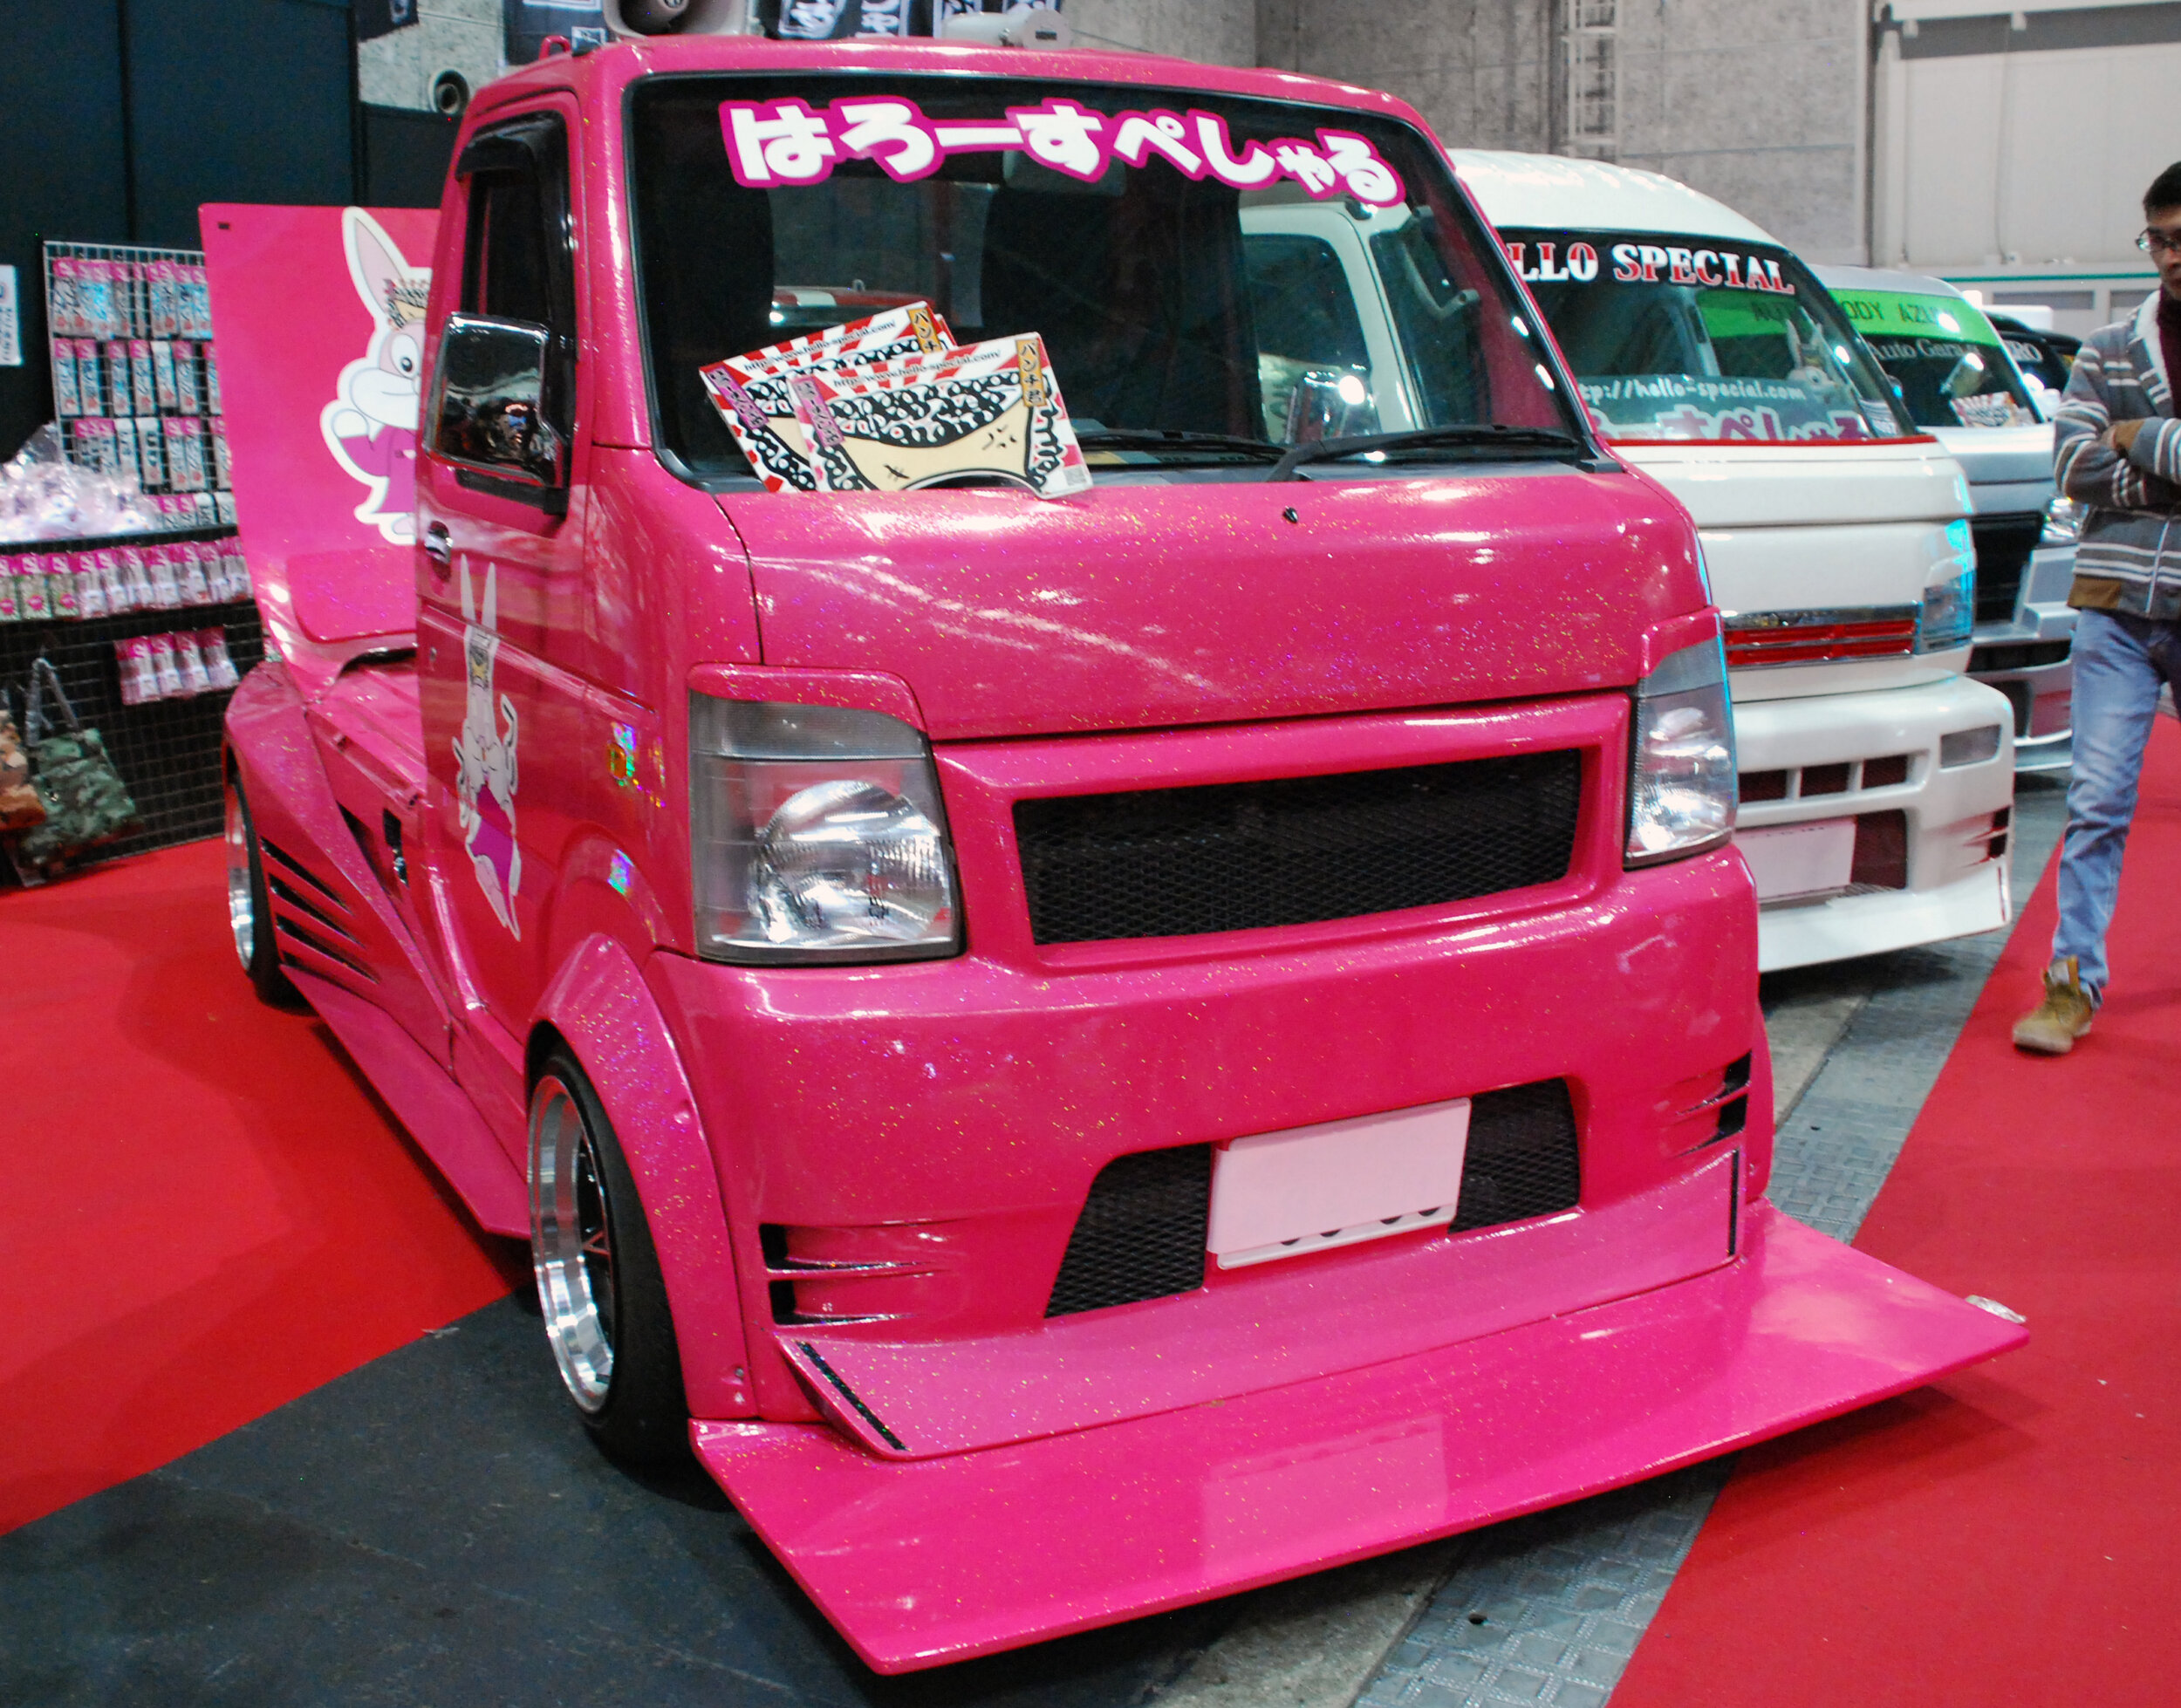
Unfortunately, there is only one company that seems to make a model-specific chin spoiler for the Alto Works, from Hello Special. It does seem to be bespoke, but it could also be a universal fit one that just happens to work well. Without closer inspection, I had to pass on the price, a cool 15400¥ ($140 USD) for a sliver of Fiber-Reinforced Plastic (FRP).

DSC09187.JPG

With a bit of searching, I eventually came across a chin spoiler online from Yahoo! Auctions for quite a reasonable price. They offered two models, one longer and wider than the other. The price the company offered for their “short” spoiler was significantly cheaper, so I couldn’t pass it up. I actually won their Yahoo! auction for at only 5000¥ ($45 USD) when they normally sell it for around 8000¥.

Given the low price and that the chin spoiler was made of FRP with a simple, black gel coat, I expected a very rough finish. It actually didn’t look too bad out of the box from a few feet away, but of course, there was a lot of pits, air pockets, and rough brush strokes on the outer surface when viewed up close. It might’ve been more or less fine with a simple coat of paint, but I wanted the car to look good.

February 05, 2020 /William Tjipto
JAPAN, JDM, SUZUKI, ALTO, ALTO WORKS, HA11S, CAR, KEI CAR, CAR LIFE, F6A, RHD, スズキ, アルト, アルトワークス, 自動車, 軽自動車, 日本, 車, AERO, エアロ, CHINSPOILER, SPOILER, LIP, リップスポイラー, フロントリップスポイラー, スポイラー
Cars, Japan, Ownership, Project Sachiel
Comment
DSC00559.JPG

[ Alto Works ] Front Bumper Modification, Part 2

January 14, 2020 by William Tjipto in Cars, Japan, Ownership, Project Sachiel

Now that I have some parts in and the front grille properly painted, we can continue our front bumper modifications on my Alto project. I actually performed this modification some months ago, but never wrote about it previously. Since I did a few other things along with it, I thought I’d discuss a bit.

DSC07698.JPG

My priority was to increase airflow toward the intake, an important aspect of turbo cars. As you might see here, it is hidden behind the right headlight, deep in the engine bay with no direct airflow, sucking in hot air from near the engine. Now that I have the hood vents in, air pressure under the hood won’t be an issue if I pipe in extra air from the front grille. The question is where on the bumper?

2018-04-15 005.JPG

So I considered my various options for a long while, at first considering the use of the far right side vent, but the logistics of drawing air from there would’ve proved a bit complicated due to the headlight mounting bracket, the limited open space, and the oil cooler.

2018-07-08 037.JPG

I settled on a 50mm aluminum duct piping and an aluminum funnel in the only open space on the front bumper, the little corner between the existing grille, headlight, and turn signal lamp.

At first, I mocked up the piping several times with masking tape and removed and refitted the bumper several times to make sure it all lined up. Of course, I have to cut the bumper to get the aluminum funnel in. It took quite a bit of cutting and sanding to get it in, but I wanted it sized just right so that it can be held in place somewhat tightly.

2018-07-08 036.JPG

I wanted to use some metal brackets, but the space behind was pretty tight, so I had to resort to using epoxy putty. My application skills are a mess, so unfortunately, it didn’t come out as cleanly as I wanted to. No matter; it was the back of the bumper afterall. Basically, the whole assembly is snugly fit, the outlet of the duct pushing up against the intake piping. 

2018-07-08 034.JPG

With the bumper back on, I took the car out for a test drive. As expected, I couldn’t tell much of a difference in performance or sound and noise levels, but in theory, this should increase airflow and pressure into the intake. Weather should still be kept out as the piping goes up and the opposite-facing HKS filter should prevent any waterlogging. However, due to the small diameter piping and the indirect flow of air, the ram air effect and overall improvement may be limited. This modification will likely only benefit the car to a very small degree on the hottest of days and the hardest of driving.

DSC09623.JPG

The next minor change I made to the front of the bumper is to clean up the front by adding a bit of mesh to the center grill for a more finished and professional look.

DSC09624.JPG

Along with that, I installed an aluminum GoPro mount directly to the bumper for stable video. My previous videos I took<l> were not secure enough because I had them on a longer arm mount which vibrated as you can see.

Here’s a quick one with the new mount, unstabilized in post. It is much more secure though I might have to reconsider in the future to mount on a stiffer point like the hood or brace the camera in additional ways. (The windshield, while very secure, is way too high and makes for a really boring video.)

DSC09642.JPG

For the last minor addition, I added some QR fasteners to the sides.

DSC09654.JPG

These are basically two aluminum mounts with a thick rubber band securing the two. It is designed so that the bumper can be quickly removed in a race setting for maintenance. Here, I’m using them to help secure the bumper since the upper radiator support mounts have a bit of play in them. And for those racing looks, of course!

You may notice one more change to the bumper here in the above shot, look forward to more about it next time!

January 14, 2020 /William Tjipto
JAPAN, JDM, SUZUKI, ALTO, ALTO WORKS, HA11S, CAR, KEI CAR, CAR LIFE, F6A, RHD, スズキ, アルト, アルトワークス, 自動車, 軽自動車, 日本, 車, AERO, エアロ, HKS, INTAKE, エアクリーナー
Cars, Japan, Ownership, Project Sachiel
Comment
DSC00557.JPG

[ Alto Works ] GT Aero Mirrors

December 30, 2019 by William Tjipto in Cars, Japan, Ownership, Project Sachiel

Door-mounted wing mirrors are essential safety items that provide a rearward and side view of blind spots. When positioned correctly, they provide a large view of things past your direct lines of sight, even when shoulder-checking. Motorcyclists and small cars disappear under towering SUVs, so quality mirrors and position are an absolute necessity. Not to mention they are necessary for legal purposes. Obviously!

2015-10-31 245.JPG

Because they are present on all automobiles, wing mirrors are often ignored on most stock cars, but when they well-designed from the factory or are replaced with aftermarket pieces, they really pop.

2015-10-31 344.JPG

Case in point are concept cars, whose large wheels and sharply raked windshields complement impossibly tiny wing mirrors.

DSC03224.JPG

While it may seem like a small thing when compared to the whole of the car, I always wanted to change the wing mirrors on my Alto Works. To me, the stock ones are really ugly. The connection between mirror and door is covered by a rubberized accordion expansion joint which is frankly strange since the mirror only pivots open and closed on one axis. It must be an ‘80 or ‘90s style thing.

DSC_0087.JPG

One of the first aftermarket options that I could find are small racing mirrors, essentially copies or variants of the APR Formula GT3 mirrors, mounted on a base compatible with the Alto. Their small size imparts a nice aero benefit, as they are designed to cause less turbulence and resistance. Not to mention really giving the car a racy look. However, because of that same reason, blind spots are a bit harder to see, despite the convex mirrors. (At least, that was the case when I looked through them mounted on a Miata.) They also don’t fit the ‘90s-Plus-Alpha styling of my Alto Works and at around 13,000¥ ($120 USD), they don’t fit my on-a-budget modifications.

DSC_0461.JPG

The most common option available for the Alto currently seems to be several styles of “GT-style” aero mirrors by two or three different suppliers These mirrors are contoured and styled so they appear to offer aero benefits as well, though in reality it probably is quite questionable. Some also offer built-in turn signals which would make the car easier to see when changing lanes. They are also about the same pricing as the above mirrors at around 12,000¥ ($110 USD) and up.

DSC_1213.JPG

The final option which I did not consider seriously at all, is a fender-mounted mirror. Fender mirrors are definitely an older retro styling thing with some 60s/70s cars having them. Personally, I think they are absolutely awesome, providing a wide view of blind spots with minimal head turning. Unfortunately, they are also really tiny when mounted so far ahead. And honestly, they don’t fit the theme of the car. Love them or hate them, I’m going to put on a set on my Roadster in the future!

DSC09316.JPG

GT Aero Mirrors
I was pretty patient, coming across several auctions over the past few months, but none within my low budget. Eventually, I won an auction of “GT-style” aero mirrors off of Yahoo! Auctions for 4000¥. That is not a bad price at all considering the price of a new set. However, the price was low because the condition is similarly just as low: the clear coat is gone and two of the outside screws have rusted. Just like the set of cheap RAYS wheels I bought, I don’t mind a little bit of proverbial elbow grease to get something looking new again. I honestly hate this fake-looking blue carbon and I would have probably recolored it even if it came in good condition, anyway. Hopefully, since the surface areas are broad, it won’t be hard to refinish.

DSC09331.JPG

About an hour of 100-800 grit sandpaper, with my hands and my back tired from hunching over, this was the result. The surface looks appropriately roughed up and should look good with a few layers of paint. I also somehow forgot to test mount them in my zeal to get them refinished. Whoops. The stock mirrors on my Alto are manual, so they are extremely easy to replace, with only 3 screws and a plastic cover holding them on. No wiring or switches to undo or remove. Luckily there are no fitment issues. It’s already looking much better than the stock mirrors even in this temporary rough shape.

I can’t count how many layers of paint I put on. Obviously, it doesn’t look as awesome as a professional job would look, but it certainly looks amazing as it does now.

DSC09196.JPG

Conclusion
Functionally, there is no aero beneficial difference between this unit and the stock set. The blue-tinted mirrors look good, but offer very different fields of view. The replacement mirrors have a slightly convex view, offering a fairly wide view relative to the mirror size, but the main problem is that they have a limited adjustment range, so more car body is viewed from both mirrors than I would like. Ideally, they should be nearly completely pointed toward the blind spots, but these are not. So in actuality, these might be worse even with the convex reflection. In addition, they are also worse because they do not fold when a tight parking situation demands it… Which means I just have to park further away from everyone to prevent people from hitting my mirrors. Technically, this shouldn’t be much of a problem since the car is relatively small in most spaces.

However, they look sporty, so that’s worth at least +5 HP, right?

December 30, 2019 /William Tjipto
JAPAN, JDM, SUZUKI, ALTO, ALTO WORKS, HA11S, CAR, KEI CAR, CAR LIFE, F6A, RHD, スズキ, アルト, アルトワークス, 自動車, 軽自動車, 日本, 車, AERO, エアロ
Cars, Japan, Ownership, Project Sachiel
Comment
  • Newer
  • Older

Powered by Squarespace