Ready Seat Belt

レディー・シート・ベルト

A look into the cool and bizarre, focusing on the Japanese import car culture and delicious ramen. Updated weekly.

  • Home
  • Blog
  • Food
  • Archive
    • Complete Archive
    • Ramen Archive & Map
    • Suzuki Alto Works HA11S
    • Suzuki Alto Works HA12S (Scrapped)
    • Suzuki Swift Sport ZC31S (Sold)
    • Suzuki Wagon R MC22 (Scrapped)
    • Newbie Guide
    • Photography
  • About
  • Facebook
  • Instagram
  • Twitter
2018-07-10 011.JPG

[ Alto Works ] Durax 15mm Wide Wheel Spacers

September 10, 2018 by William Tjipto in Cars, Japan, Ownership, Project Sachiel

I previously discussed wheel spacers and brief positives and negatives of using them. After a few months of riding on non-hubcentric simple wheel spacers, I’d like to strongly recommend that you do not use them.

I discovered that even a few millimeters of off center from the center bore resulted in potentially dangerous wheel wobble at high speed on toll roads. When going triple-digit-kilometer speeds (don’t get excited, that’s only 60 MPH), the right side and particularly the rear right wheel, experienced barely noticeable, but nonetheless worrisome undulating vibrations. I did not experience this wobble at similar speeds on the same road prior to the spacers and on these same wheels/tires.

2018-07-05 003.JPG

After some measurements, I felt that I could get away with 15mm spacers, but not more without fender rolling. This would effectively give the stock Enkei wheels a +30 spacing. I initially only picked up a set of two as a test to see if I could get away with using them without hitting the fender. For a reasonable sum of around 2800¥ ($26 USD) shipped, I got these Durax 15mm A6061-T6 aluminum spacers with chromium steel wheel studs and carbon steel nuts.

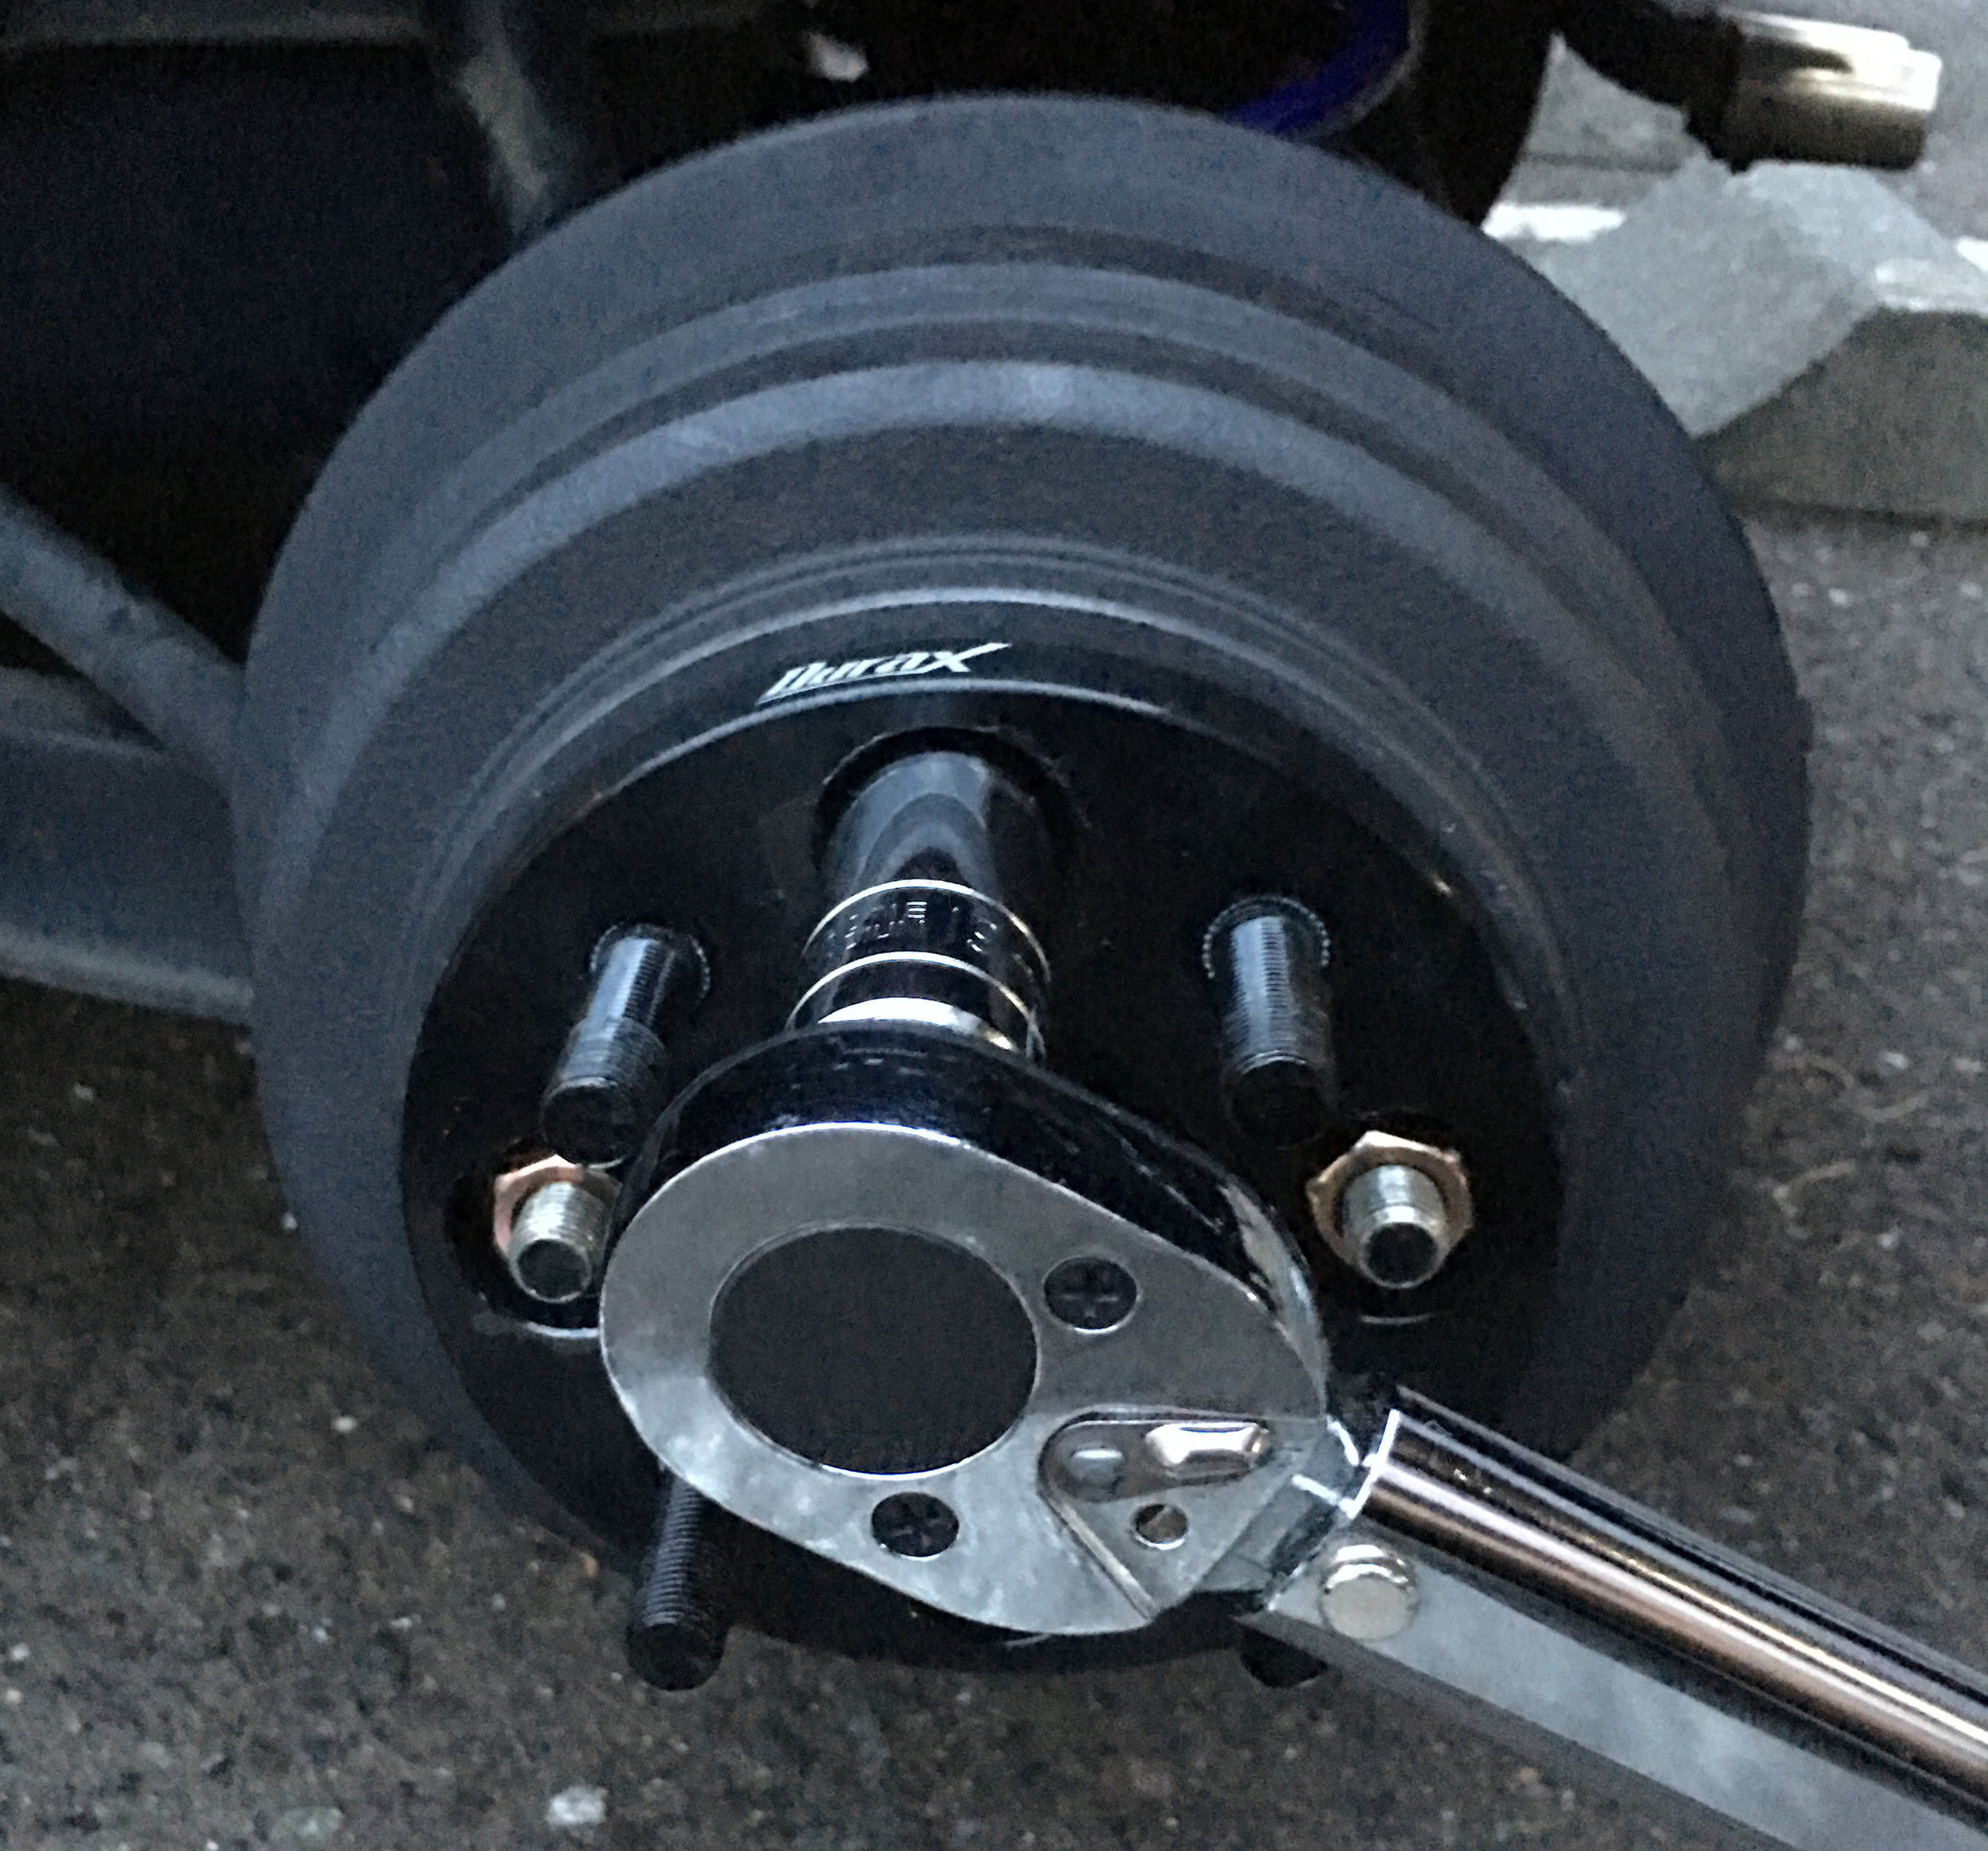
I’ll bet you, as a reader, stopped at “Durax.” One vowel away from Durex. This isn’t the first time I’ve seen Dure.. Durax products in Japan. They are an importer and rebrand company of various Chinese-manufactured car accessories, though generally I have found their products to be surprisingly decent and well-made. For my Alto Works, I’m okay with running cheaper, but decently made parts.

While these are not technically hubcentric spacers, hypocritically contradicting myself from earlier, the tapered spacer lug nuts do help “center” the spacer when tightened down, so it should not be a notable issue. However, I was worried that with only 15mm of spacer, the spacer nuts might stick out past the spacer, preventing use with certain wheels. I was glad to see that the spacer nuts were just thin enough that they sit slightly deeper than the spacer face, allowing the use of most wheels.

2018-07-02 003.JPG

Most steel wheels, all multi-pattern wheels, and a few other alloy wheels will not be usable with a 15 or 20mm spacer. The reason is due to the length of the stock studs, which will protrude past the spacer face into the wheel mating surface. Most aftermarket wheels have hallowed-out areas between studs to lighten the wheel, which also allows the remainder stud to clear.

2018-07-07 012.JPG

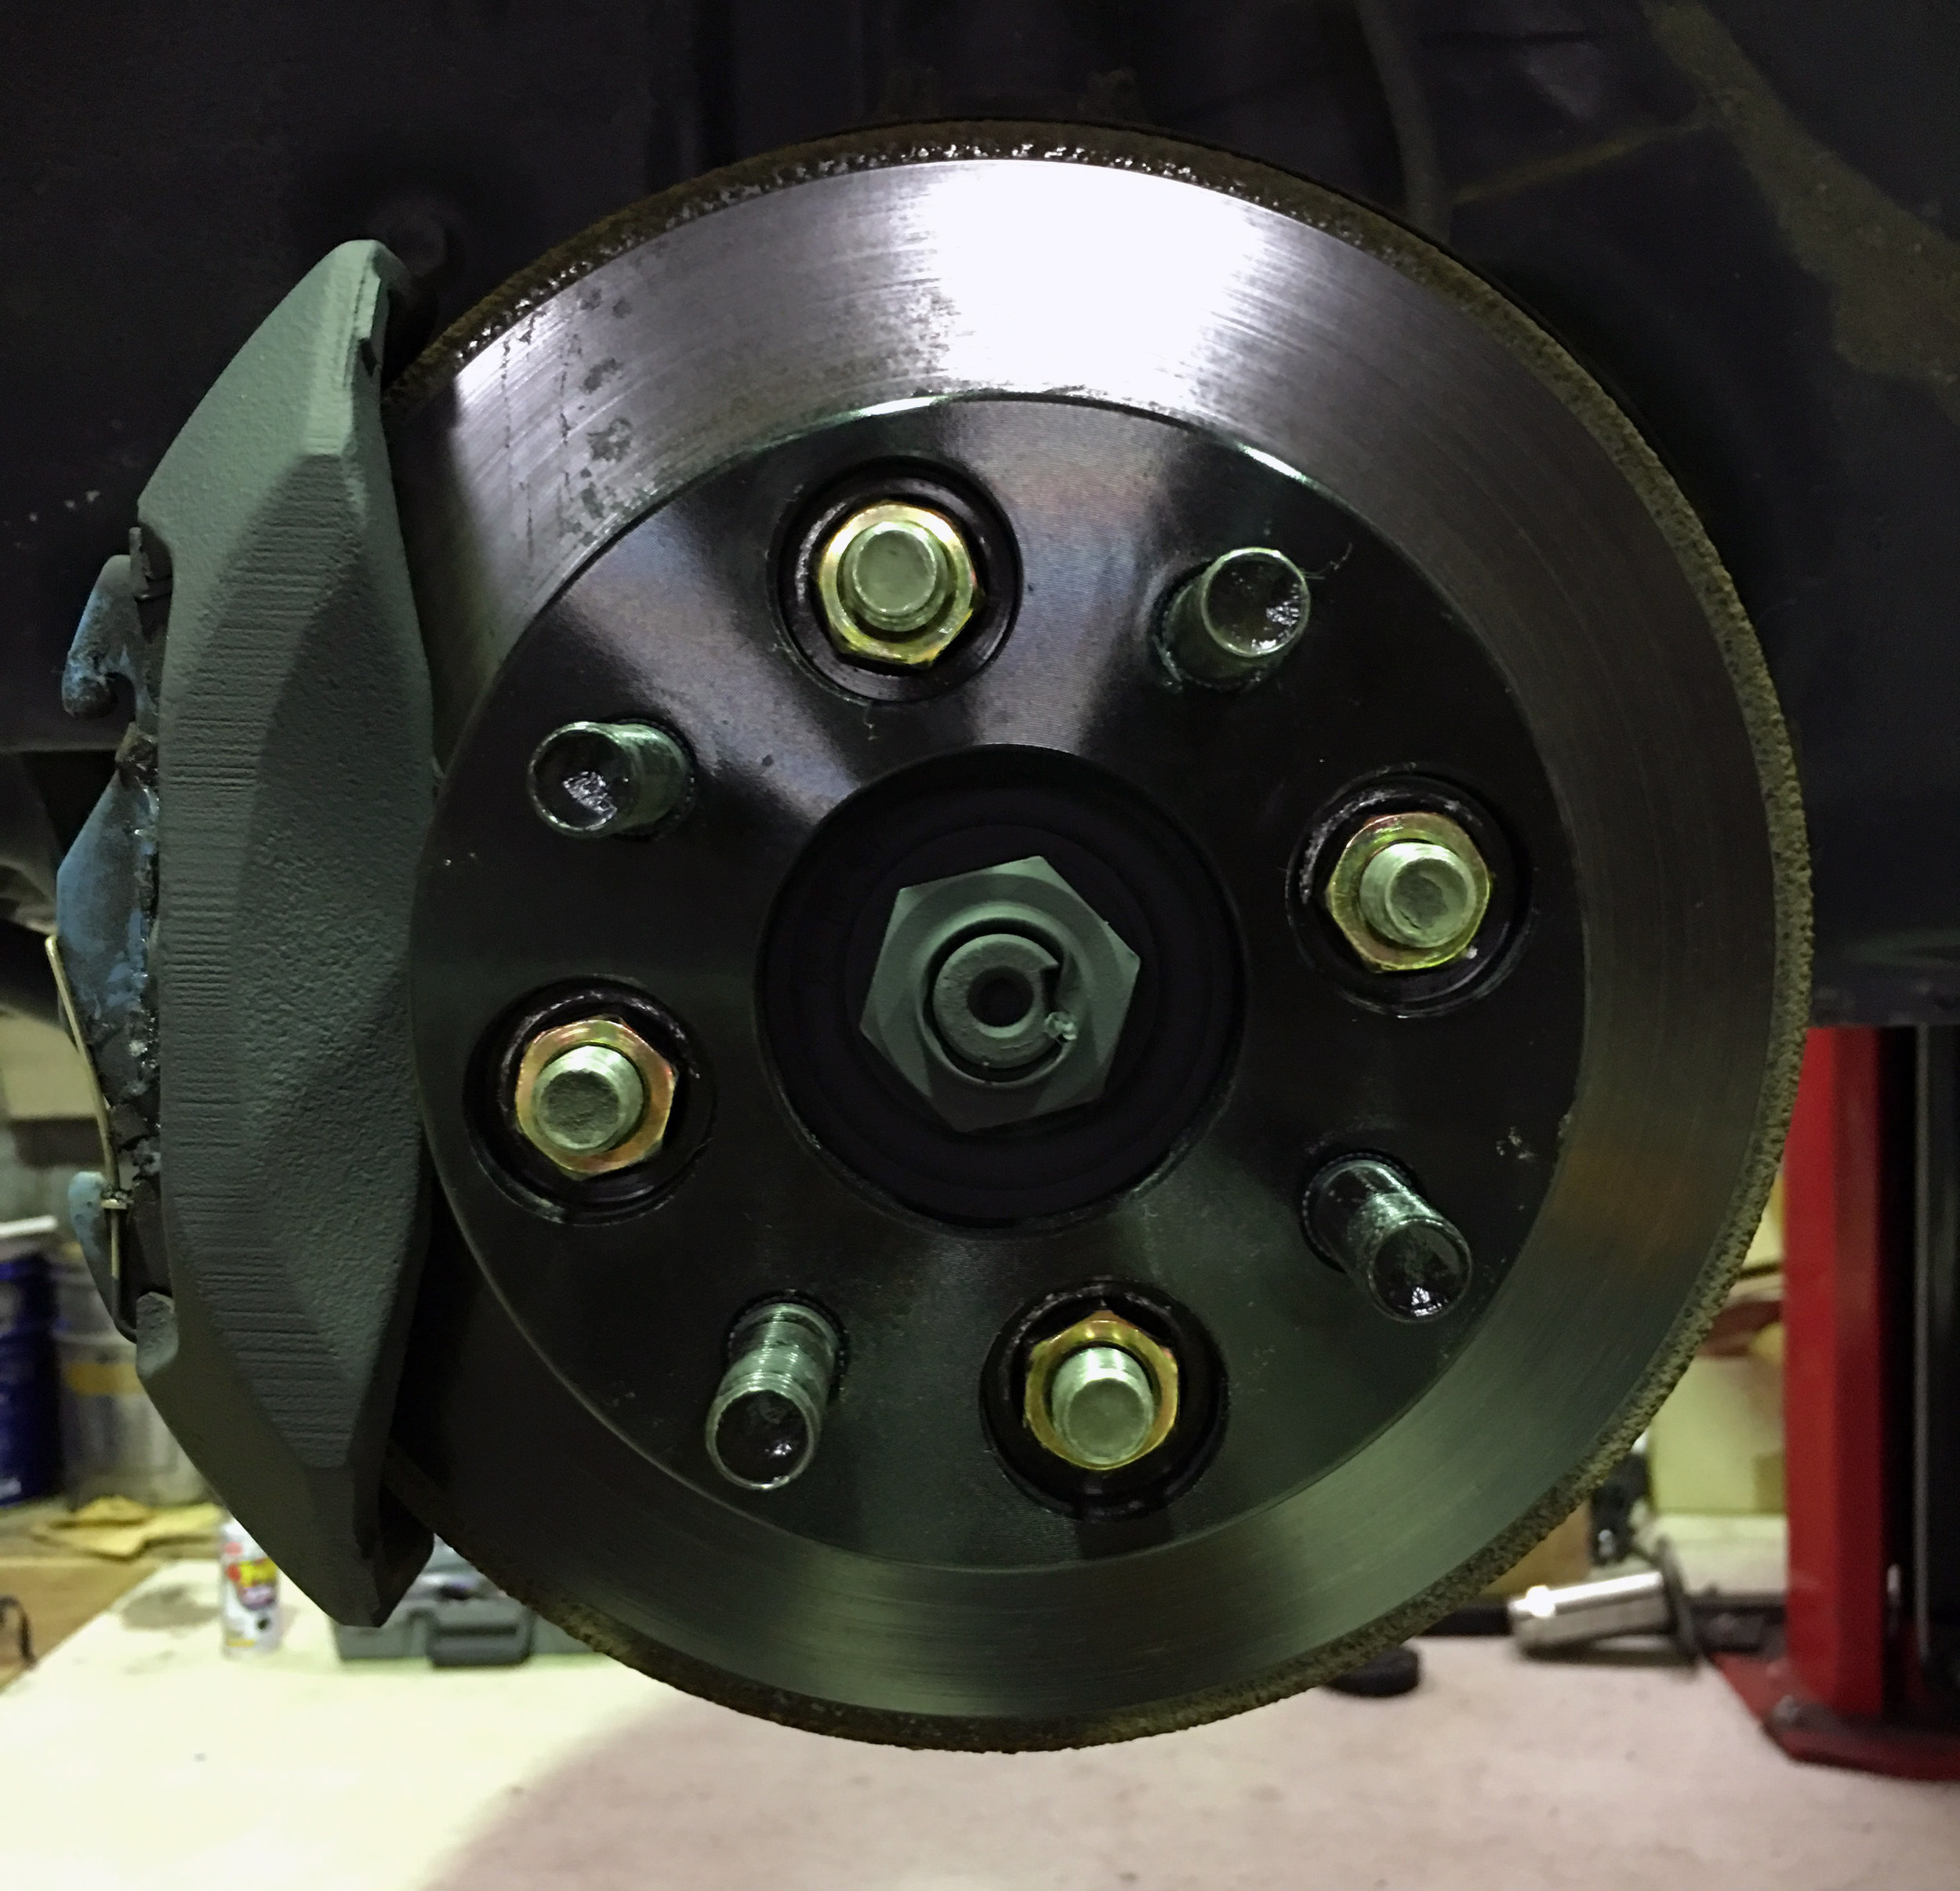
After my spacer install, I soon discovered that the studs on the spacers were quite a bit longer than the stock ones (~33mm compared to ~23mm, respectively). This would necessitate only longer wheel nuts and the stock ones on my Alto Works are just barely long enough.

2018-07-07 015.JPG

By “barely long enough,” I really mean exactly that. Upon a test install, the stud just touches and scratches the inside end of the nut. Which means, although it appears to be tightened down, a few micromillimeter gaps could be present between the wheels and the spacers.

This will do for now until I get my second set of spacers in the mail…

2018-07-12 006.JPG

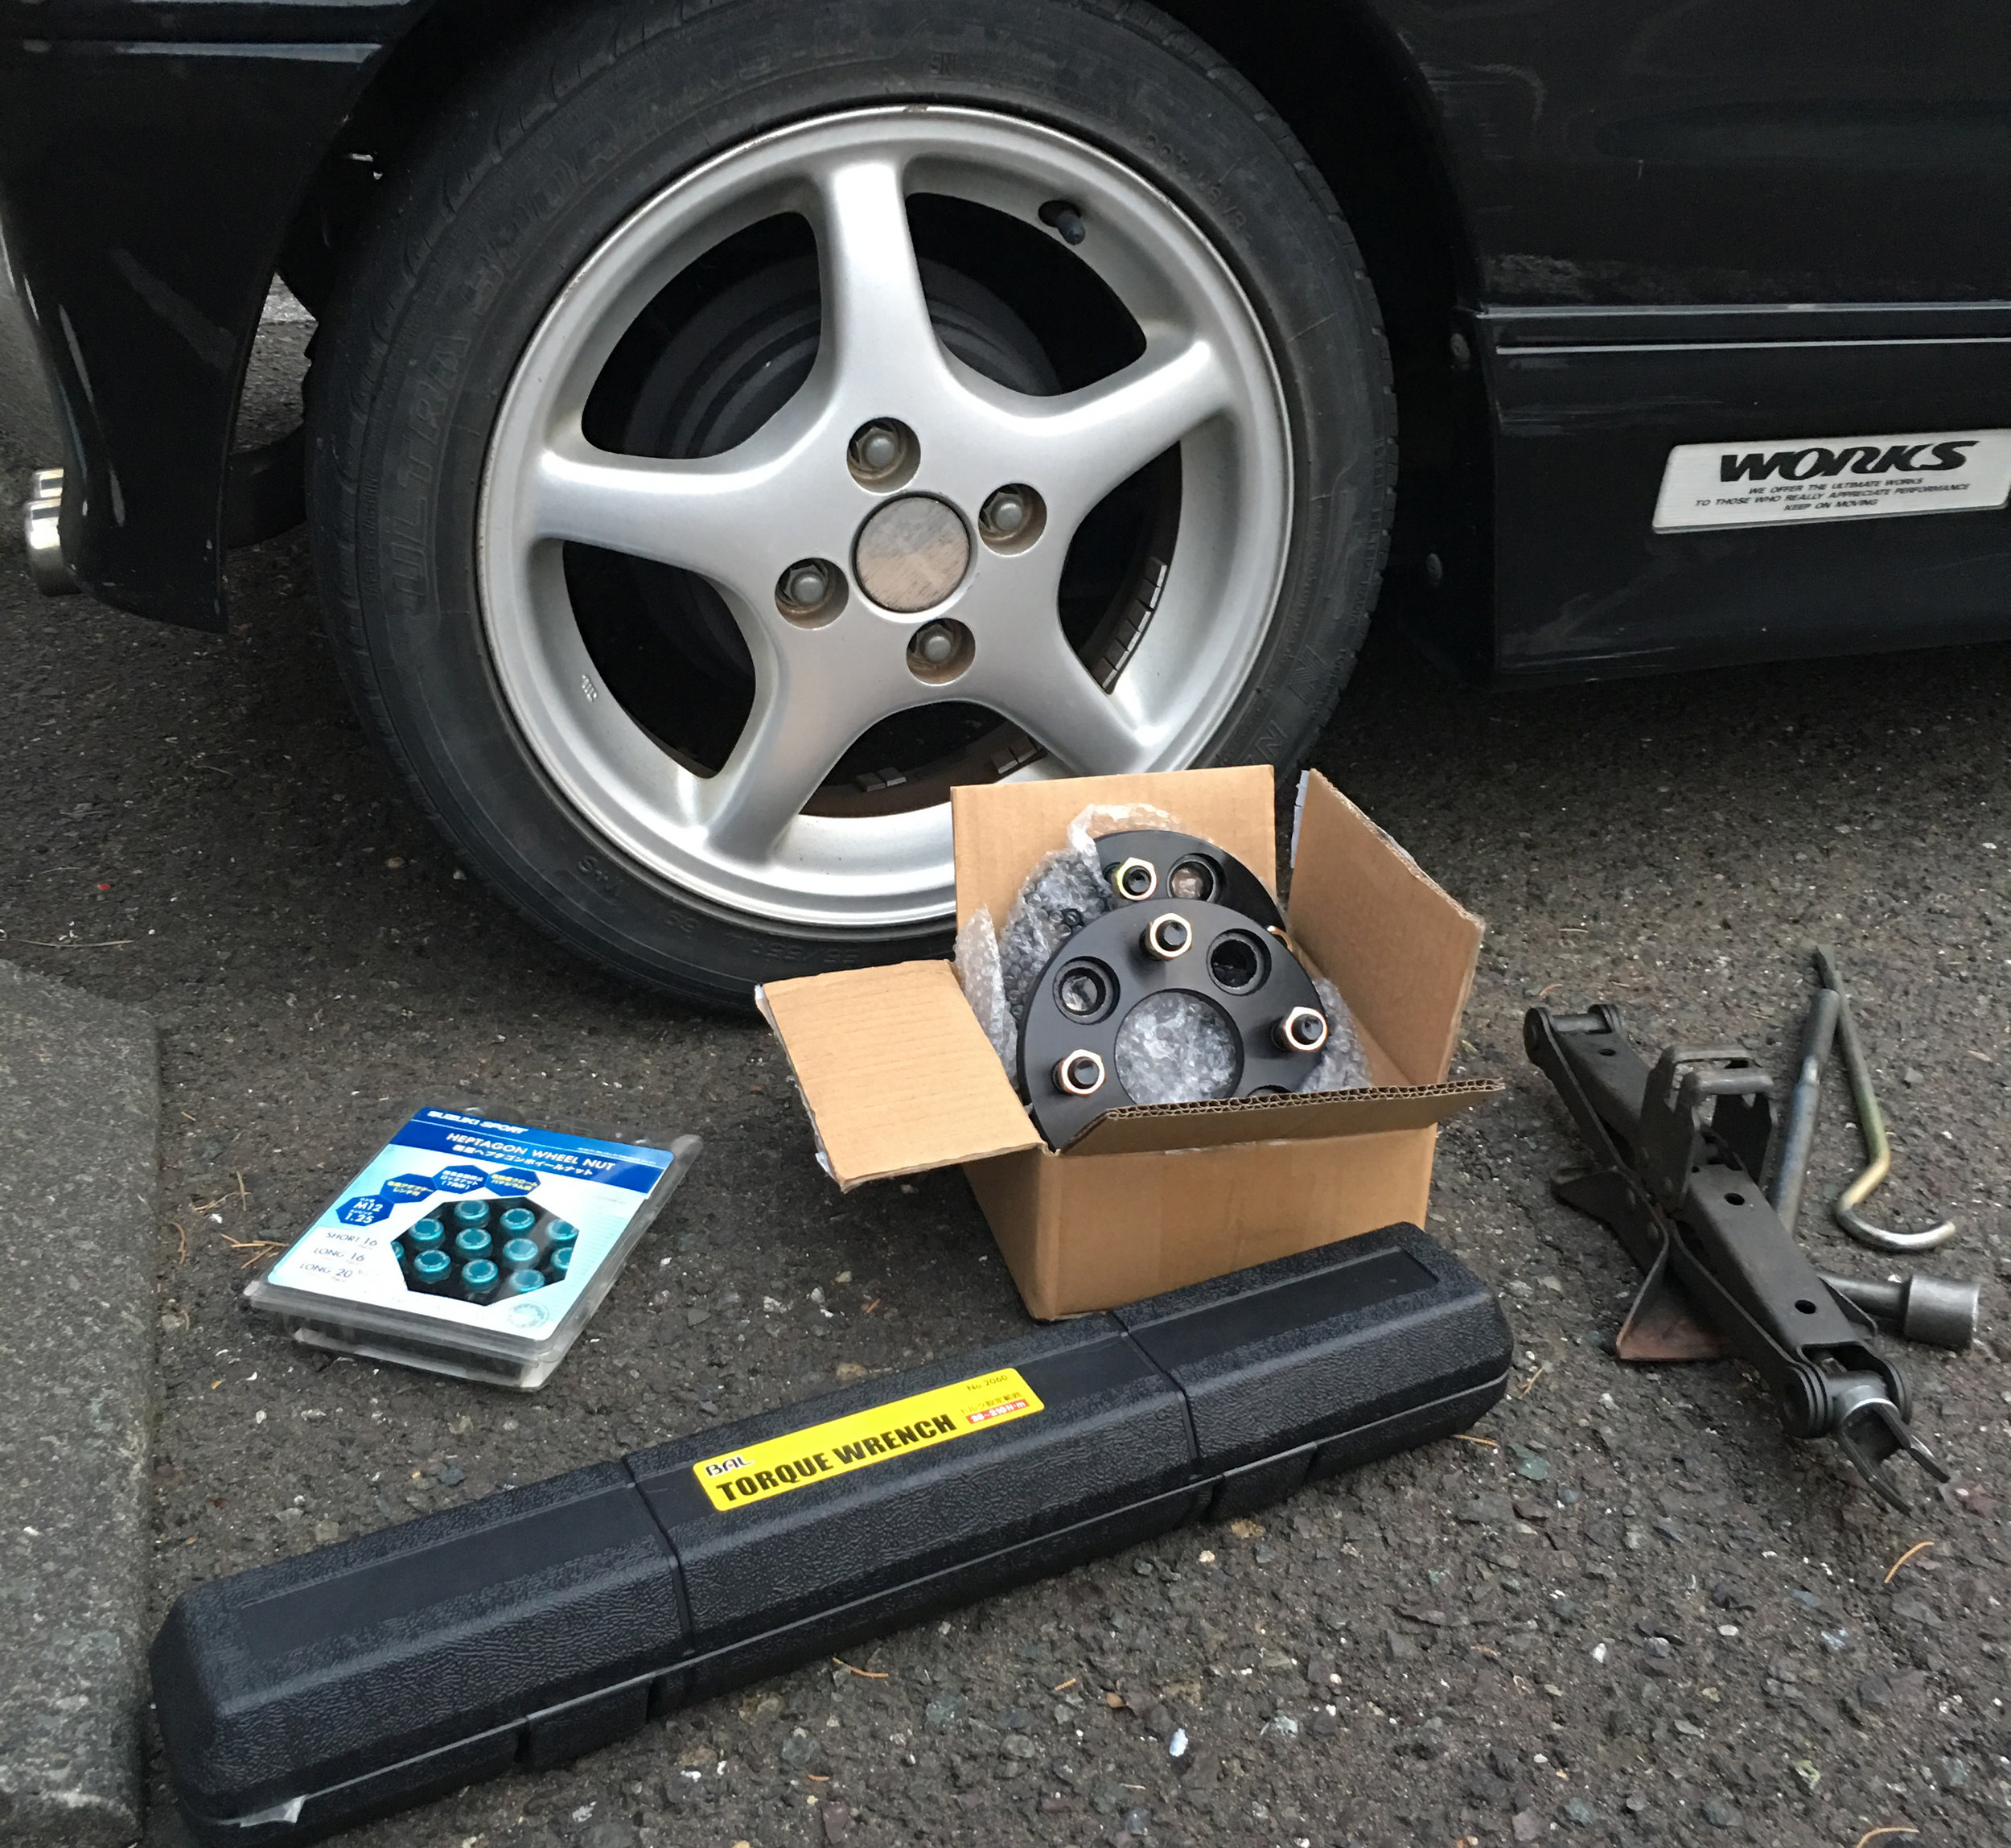
Now with the second set received in hand a few days later, I can proceed to install the rear spacers. This time, I took the time to replace all the stock nuts with a set of Suzuki Sport Heptagonal Steel Long Lug Nuts. These should be long enough to not have issue with the extended studs of the spacers.

2018-07-12 007.JPG

I’m installing these the good ol’ fashioned way, in my parking lot in front of my house. As always, folks, use a proper torque wrench to ensure the proper torque specs. In my case, the recommended torque for lug nuts is about 110 Nm, equivalent to the typical US recommendation of 80 ft-lbs.

2018-07-12 008.JPG

With both fronts and rears installed, I can say quite happily that the lower offset of the spacers have really improved the overall look of the car, pushing out the wheels to just a millimeter past the fender edge. This is absolutely gorgeous from every angle and makes even the stock wheels look pretty darn good, in my opinion.

2018-07-10 014.JPG
2018-07-15 001.JPG

So how does it fare? Do these 15mm spacers along with the lower stance of the car cause massive fender rubs? I am a bit surprised to say that the front tires have yet to kiss the fender edge, considering there is not much of a wheel gap. However, the rears, with a greater wheel gap but likely softer springs, do actually rub on hard bumps or sudden dips. Although it isn't terrible, it's far from ideal. Which means I have a short task on my list again for next time...

As an added benefit to the wider shoulders, corner turn-in has become marginally more responsive and it feels a bit more planted in wide turns, though it is really hard to say given my old, dry Nankang rubber. (It is harder for me to get consistent feedback.) For the look alone, though, I think this modification was worth it, particularly for my next set of winter wheels that I just picked up...

September 10, 2018 /William Tjipto
JAPAN, JDM, SUZUKI, ALTO, ALTO WORKS, HA11S, CAR, KEI CAR, CAR LIFE, F6A, RHD, スズキ, アルト, アルトワークス, 自動車, 軽自動車, 日本, 車, Durax
Cars, Japan, Ownership, Project Sachiel
Comment
2018-07-08 028.JPG

[ Alto Works ] Hood Vents, Part 2: Cutting

September 04, 2018 by William Tjipto in Cars, Japan, Ownership, Project Sachiel
2018-06-24 003.JPG
2018-06-24 001.JPG

Day 1

Now that I have an idea where the hood vents will go, time to get down to the business of cutting. Measure a thousand times and cut once, of course. I tried to make sure that the vents would be even on both sides of the car by making a template I can mirror. A simple scrap sheet of A3 paper (11.69 x 16.53 in to Americans), aligned at the edges of the hood, ensure a perfect fit. Marked off, checked against several measurements, and I was ready.

2018-06-27 002.JPG

Here goes nothing… First comes a center punch to ensure my drill does not wander. As soon as that first “click” was made, I was fully committed. I followed up by drilling at all corners so it would be easier to cut for the sawzall (reciprocating saw).

2018-06-24 007.JPG

Out came the sawzall next, which made quick work through the thin steel hood skin. However, it did have a bit of problem trying to cut through the actual hood reinforcement skeleton, as it was a much thicker. With a bit of practice, I was sawing fairly clean lines around my template. Once the outer skin was cut, I could proceed with the skeleton underneath, clearing space for the vent mounting nuts on the other side. Then the mounting screw holes were drilled very carefully.

2018-06-24 010.JPG

And it was done! As this is a steel hood, I took the time to add a few layers of black paint to protect against rust, accelerated with the help of a heat gun. Although I wanted to clean up some of the lines a bit, it was already past 7 in the evening, so the other side will have to wait for another day.

2018-06-24 014.JPG

One side down, one more to go.

Day 2

A week or so later, I was finally able to get around to finishing up the other vent. I actually had two comments this past week from people I know regarding the added vent, so apparently it’s quite noticeable, for better or worse. Let’s get cutting!

2018-07-07 002.JPG
2018-07-07 004.JPG
2018-07-07 006.JPG
2018-07-07 007.JPG

This time around, I was much more thorough on finishing the edges of the cuts properly. I dremel’d smooth all the rough edges made from the drill and the sawzall. This not only made the underhood much cleaner, the smoother surface allows the paint to cover the edges and hopefully not leave any exposed steel to rusting.

2018-07-07 014.JPG

Upon close inspection, the vent doesn’t completely sit flush with the hood, leaving some edges lifted by one or two millimeters; hardly noticeable for most people. If I ever have to take off the vents for a repaint or some other reason, I’ll definitely seal the edges with silicon or epoxy. For now, the look is absolutely aggressive and definitely makes the front of the car stand out.

I’m gonna make hood vents “a thing” on all my cars from now on. Sorry, Swift Sport. You’re gonna be next!

September 04, 2018 /William Tjipto
JAPAN, JDM, SUZUKI, ALTO, ALTO WORKS, HA11S, CAR, KEI CAR, CAR LIFE, F6A, RHD, スズキ, アルト, アルトワークス, 自動車, 軽自動車, 日本, 車
Cars, Japan, Ownership, Project Sachiel
2 Comments
2018-07-10 013.JPG

[ Alto Works ] Low Down Suspension, Part 2: Less Low

August 27, 2018 by William Tjipto in Cars, Japan, Ownership, Project Sachiel

I’ve rolled around the past week and a half on these cut springs and I can say it has been an uncomfortable week, at best. Just in the four minutes it takes me to get to work, I have several bumps over bridges that really shake and rattle the car, unless I drive ridiculously slow. How did those kids in the 90s with cut Honda Civic springs handle it?

Unfortunately, I can't uncut my rear springs, so I either had to fork over for a new set of springs or find some replacement stock springs and re-cut again.

2018-06-29 039.JPG

I was lucky enough to have my friend pass to me his old Wagon R (MH22) lowering springs for free, as he upgraded to a full adjustable suspension set-up. While these springs aren’t exactly in the best condition with a bit of surface rust, they are functional as-is. I’ve heard that many kei parts are interchangeable, especially from the same manufacturer and similar years. Engines, suspension components, and some interior bits are reused from different years and models in order to cut production and manufacturing costs. These springs are about a decade newer, so will they fit?

2018-06-29 040.JPG

Putting the cut stock spring and the Wagon R spring side-by-side, we can immediately see a difference in the spring sizes. While the perches and top hat diameters are almost exactly the same, the coils at the main body of the spring were much wider.

With a quick test for fitment, we decided to have a go at this set to get the height that I want.

2018-06-29 047.JPG

Back to cutting... this time, I went off with only one revolution coil off the top. This ensures the spring perches would sit in the same locations and that it would not have a radically crazy drop. As much as I liked the low look, it was undriveable.

Before and cleaning materials shot
The rotors and drum were rusty, but it appears to be mostly surface rust and only minor pitting like almost every other car out there on the road; nothing to be alarmed about and certainly nothing worth replacing just yet. The front pads are relatively new and the rotors aren’t too worn.

2018-07-07 010.JPG
2018-07-07 011.JPG
2018-06-29 042.JPG


While the wheels are off the car, I wanted to refresh the appearance of the brake system, since there is a lot of surface rust. I started off with coarse, 100 grit sandpaper and scrape off the rust, being careful to avoid sensitive rubber hoses and caps, then moving to a 240-grit to finish off. I wasn’t super thorough, as I could’ve removed the caliper to get an even better clean, but this is more than good enough. The rear drums were much easier, as they had a blank, flat surface.

After cleaning off with a rag and brake cleaner, I thinly layered around 3 coats of black high-temperature paint. This paint will supposedly endure up to 600° C (about 1112° F) which is seriously overkill for this application. (If my car started reaching those temperatures, flaking paint would be the least of my worries.) I opted for a regular flat black instead of a red color many people use when painting brake calipers, as these brakes are sadly nothing special that might warrant a flashy color.

This simple change really makes the open-spoke wheels pop, since they are not ruined by hideous brown rusted parts underneath and the color contrast is much stronger with the silver wheels against the black brakes.

2018-06-29 046.JPG

Sadly, the car now rides a bit higher than it was with the previously cut Alto springs, but thankfully, it isn’t constantly riding on its bumpstops. It only has a slight squeak from the spring perhaps rubbing on the top hat, but I see no issues with its width or otherwise that might result from the increased size.

The car rides generally much better now. Perhaps partially due to the lower ride height, I think there is significantly less body roll in tight corners than it was with stock ride height. Unfortunately, with the soft springs in the rear and the increased (shortened) spring rate in the front, the car definitely doesn’t feel quite as it did before. It is definitely biased for understeer now, as the car is less apt to want to rotate unless I aggressively left-foot trail brake or "Swedish flick" the car to promote weight transfer. While that might not be particularly good for the track, this will be safe and adequate for driving around town.

A better suspension setup will have to come later when budget and time afford it.

August 27, 2018 /William Tjipto
JAPAN, JDM, SUZUKI, ALTO, ALTO WORKS, HA11S, CAR, KEI CAR, CAR LIFE, F6A, RHD, スズキ, アルト, アルトワークス, 自動車, 軽自動車, 日本, 車
Cars, Japan, Ownership, Project Sachiel
Comment
2018-06-22 075.JPG

[ Alto Works ] Low Down Suspension, Part 1: Moar Low

August 20, 2018 by William Tjipto in Cars, Japan, Ownership, Project Sachiel

“Low down” (ローダウン)  is a Japanese term to describe something “lowered” in English, such as lowered cars, lowering springs, etc. I suppose that “low” alone doesn’t imply “down,” so both words had to be applied. Today, I’m going to chronicle my process of my “low down” Alto Works and it’s surprisingly disappointing results.

2018-04-27 028.JPG

As evidenced from many of my pictures, the ride height on my Alto is pretty ridiculous and the offset on the wheels seem pretty high, as the wheels sink far into the wheel wells. Between the top of the tire and the fender lip, there is a huge 7cm (2.75 in) fender gap for the front and a 6.5cm (2.55 in) gap for the rear.

2018-05-22 004.JPG
2018-05-22 005.JPG

Yup, I can finger it pretty good. This definitely could use moar low to make it look more appropriately sporty. Besides looking better, what are the benefits or drawbacks of lowering a car? Lowering a car theoretically lowers the center of gravity, which can improve handling and roll, and minimizes underbody drag. There is a finite level of this, however, as slammed cars lose tire contact patch, have limited suspension travel, and risk damage to the undertray, exhaust, and numerous other parts. Lowering a car, even just a bit, changes suspension geometry which can also affect handling negatively, as OEM engineers designed the car for a certain specification. Lowering springs necessitate higher spring rates to prevent bottoming out on suspension components, which can worsen ride quality, comfort, and wear down struts and shocks prematurely. (There are numerous other factors at play, so let’s keep the discussion simplified for now.) As always, every car is a bit different, so there is not one answer that can be applied broadly to this argument.

This is the new 2018 Swift Sport, the "performance variant" of the Swift.

This is the new 2018 Swift Sport, the "performance variant" of the Swift.

This is an older, base model Audi TT. Note the reasonable ride gap.

This is an older, base model Audi TT. Note the reasonable ride gap.

I’m always thoroughly annoyed that a good majority of JDM cars have ugly amounts of uneven ride height. The Prius, Fit, Axela (Mazda3), MX-5, Civic, etc. etc. all have terrible fender gaps, some having more gap in the front suspension than the rear. Yes, I am aware that FWD cars tend to have more gap in the front to allow for travel, but at least they could do it so that both fronts and rears are even. This is made worse if you compare virtually all European makes like Mini, BMW, Audi, Mercedes, VW… front or rear drive, the majority have a nice, centered wheel gap that is both usable and even. You cannot argue that Japanese roads are worse, so they need the bigger gap, as European roads are notorious for uneven gravel, cobblestone, or pothole-ridden countryside roads. My friend always suspects its a conspiracy to keep the aftermarket suspension companies alive. Anyways, I digress. I frankly dislike the ride height as it stands now. Let’s find a solution to that and hopefully improve handling in the process.

There are still quite a few manufacturers offering lowering springs for the HA11S Alto, with huge price variations from around 9000¥ ($82 USD) to over 20,000¥ ($182 USD) for the springs alone. Most manufacturers offer similar lowering height, around 25-35mm lower than stock, and similar spring rates, about 2.4 - 3 kg/mm so the choice was pretty easy…

I’m cutting the springs. As much as I’d like a proper suspension setup, it’s difficult for me to justify more than 40,000¥ ($365 USD) for coilover fronts and adjustable rear perch sets, considering the price I paid for the car. Even at 10,000¥ ($91 USD) for a spring set from a better known aftermarket company, the price is a huge percent of what I paid for the car itself. For now, this experimentation on DIY lowering will have to suffice. I figure if the shocks wear out or I mess up cutting the springs, I can go aftermarket out of necessity. The project car will remain a poor man’s project. Don’t try this at home, kids.

2018-06-22 028.JPG

Let’s get the car down by lifting the car up. First, off go the wheels. We opted to lower the fronts first since that would likely take the greatest amount of time and effort, as we would have to disassemble the struts every time we make a change in the spring height. Second, we removed two bolts at the steering knuckle and cleared the brake line. Two nuts hold the strut to the strut towers and the struts were clear.

2018-06-22 018.JPG

With the aid of spring compressors, we made quick work of disassembly. Judging the spring, we estimated the first revolution of the coil would affect little change, so we decided at least 1.5 coils, and marked with a paint pen 1.5, 1.75, and 2. We could always go from there.

2018-06-22 020.JPG

Alright, here goes nothing. Cradling the spring in a motorcycle stand (like I said, don’t try this at home), we used an angle grinder to cut the spring. Sparks flew and the spring cut through like… cold butter? Smoothly and with only a bit of resistance.

Reversing the install process and only hand tightening all the mounting points would be enough to check the spring compression. Of course, the wheels were properly tightened a bit more to ensure it wouldn’t fall off when we pushed down on the front to check compression.

Sadly, it wasn’t quite enough to get the spring where I wanted it to be. It only lowered the car by around a centimeter, so we disassembled the struts again and cut the spring at the 1.75 mark. This second cut was just the right height! Now there was about a 3cm gap in the front, making the front of the car that much better looking. Now onto the rears!

I knew starting this job the trailing bar rear end of the car was going to be easy and quick to lower, as the suspension setup is extremely simple. We lifted the car at the tow point, which was a reinforced loop at the rear frame, right behind the license plate. One bolt per gas strut allowed the entire trailing arm to be lowered, just enough to clear the rear springs with a bit of wiggling around. The gaps in the rear springs were much wider, so we would have to be a bit more careful with the cuts we made. In much the same process as the fronts, we instead paint marked at the 1 and 1.5 coil revolutions.

In addition to cutting the springs, I cut off the first notch of a three-notched hard rubber bump stop. This would allow the car to have more clearance when the car is lowered.

Sadly, our first cut resulted in little change. The car seemed to have only lowered around a half-centimeter. I’m glad the angle grinder makes quick work of lowering the car. We went for 1.5 revs for the second cut for the rears, which turned out to be a bit of a mistake, as I’ll explain soon.

2018-06-22 037.JPG
2018-06-22 038.JPG

Once the car was back on the ground, I was excited. The car stood at a gorgeous ride height all around, with a wonderful front wheel gap and a 2 cm rear wheel gap, translating to around 1.5 fingers at the front and barely 1 finger gap at the rear.

2018-06-22 030.JPG

Unfortunately, on closer inspection, we realized the rear of the car was basically sitting on the rear bump stops. This means the spring has very little compression before it smacks up against the already-cut bump stop; terrible for driving on these bumpy, local roads.

2018-06-22 069.JPG

I will admit, however, that the look of the lowered car was unbelievably gorgeous. Lowering it transformed the look immensely, changing it from pedestrian and stock to sporty and modified. I am so pleased at the look that I didn’t consider how terrible the ride will be...

2018-06-23 001.JPG

...and it is horrendous. The rear bounces and hops at every deep dip, manhole, and bump in the road. On the more notable road imperfections, the car bangs against the bump stops, shaking and rattling the whole of the car. More worryingly, at higher speeds on curvy roads, any mid-corner bumps really upset the car and increase slip angle when the car hops. It was an “interesting” experience in the rain when the rear end wanted to meet the front unexpectedly… It’s actually like a rear wheel drive, but with a greater degree of risky, somewhat uncontrollable danger. Kinda like a Toyota MR2. Beyond the discomfort of driving on rough roads, it will be definitely dangerous to have any spirited drives in this state.

2018-06-22 046.JPG

I will have to raise the rear of the car back up at a later date with, preferably, proper aftermarket springs or at the very least, replacement stock springs that I will have to re-cut. Like I said: don’t do this at home. Or at a garage. Just… don’t do it at all, in fact.

August 20, 2018 /William Tjipto
JAPAN, JDM, SUZUKI, ALTO, ALTO WORKS, HA11S, CAR, KEI CAR, CAR LIFE, F6A, RHD, スズキ, アルト, アルトワークス, 自動車, 軽自動車, 日本, 車
Cars, Japan, Ownership, Project Sachiel
Comment
DSC_1242.JPG

[ Alto Works ] Hood Vents, Part 1

August 14, 2018 by William Tjipto in Cars, Japan, Ownership, Project Sachiel

The appearance of ducts and vents on the bonnets / hoods of cars often denote sporty or performance intentions. NACA ducts and hood scoops feed air into the intake or through top-mounted intercoolers and rear facing vents extract heat and encourage additional ventilation through the front radiators, lowering the pressure inside the engine bay. Several generations of the Mitsubishi Lancer Evolution are good examples of this, some featuring both intakes and extractors and all are designed to be functional.

Those hood vents on the aftermarket hood surely look cool, but alas... they're fake. What's the point?

Those hood vents on the aftermarket hood surely look cool, but alas... they're fake. What's the point?

As much I love the Challenger, those hood vents are also not functional and a bit tacky.

As much I love the Challenger, those hood vents are also not functional and a bit tacky.

Unfortunately, they are often pasted on as a questionable cosmetic enhancement by consumers, though some OEM production cars are just as often guilty of this. Gluing on a fake hood scoop does exactly the opposite of performance enhancement. But I’m definitely all for attaching a functional heat extractor vent that just happens to look good, too.

2017-07-26 004.JPG
2017-07-26 002.JPG

Knowing the potential benefits of installing a vent, I cut into my precious Roadster hood several years ago and installed a set of Flyin’ Miata aluminum louvers. I roughly followed their recommendations for vent placement for maximizing airflow in the lower pressure regions of the hood, but I opted for stainless screws instead of rivets for ease of removal should I decide to repaint in the future. I also drilled holes through the hood support ribs instead of removing them completely to keep rigidity.

It turns out the vent functioned really well. While I didn’t have a water temperature gauge to measure engine bay temperatures at the time, I estimated temperatures before and after the modification. After venting, I found that the heat is kept fairly moderate and consistent, even when running hard at a local track or Auto-X. There is a drawback, however: there is a slight smell from the engine when I am idling or driving slowly through traffic with the windows down.

2018-05-20 024.JPG

I picked up these vents off of Yahoo! Auctions, which is much more popular than eBay in Japan, by far. I initially had no idea where they originally came from, as they appear to be from some OEM application judging from the mounting screws on the underside. After scouring the internet for literally hours (while watching Netflix), I finally found the source of the vents: a relatively rare 1990-1994 Nissan Pulsar GTI-R, an awesome WRC-homologated, AWD turbo rally car. While they are a bit large, I think these 90s vents will fit well with the old-school feel of the car, providing both a rally look and additional cooling.

2018-05-11 006.JPG

Before I put the vents on, some testing is in order. While there is plenty of pressure numbers available for the Roadster on the internet, but I couldn’t find real testing results for this generation of Alto. Simply judging vent placement by various users on Minkara didn’t tell me how much they actually tested it, other than “It looks cool” and “I think it works.”

2018-05-11 005.JPG
2018-05-11 007.JPG

This is commonly called the “tuft test” and it involves taping some yarn to various areas, taking a drive, and recording the results. The motion of the thread can tell us two important things: airflow turbulence and air pressure around the various surfaces of the car. The information from this will help me determine the best place for the vents. (Just as an aside, I actually made a mistake on the tufts, as they should've been cut shorter as to not touch the other masking tapes. However, it should not have affected my findings much.)

I was honestly a bit surprised from the videos I took of the yarn. It looks like the hood has major airflow around more surfaces of the hood than my Roadster did with similar testing, perhaps due to the rather angled hood surface. As with most cars, there are some lower pressure areas in the middle area of the hood, away from the windshield, front bumper, and fenders.

2018-05-11 009.JPG

Along with testing the hood, I also did a bit of testing along the fenders. As with most cars, the air directly behind the wheel is extremely turbulent, but fairly smooth and consistent near the top of the fender. There could be a lot of improvement in this area… if you didn’t already guess, I have plans for the fenders soon.

2018-06-03 009.JPG

Before I get into cutting into the hood, I wanted to make sure critical components under the hood are well protected from the elements like the heavy rainfall we experience in Japan. I already designed the heat shield for my HKS Super Power Flow intake with the idea that I would eventually install hood vents, hence the extra large piece of aluminum effectively covering more than half; well past where I would install the hood vent in an effort to prevent waterlogging the engine. However, the left side has a critical component not covered yet at all: the battery.

Obviously, as aluminum is an effective electrical conductor, I have to use a plastic or polymer of some sort. At the hardware stores around Japan, I can find large quantities of different plastics like acrylic board and PP (polypropylene). While acrylic and PP are heat resistant up to around 100°C and 130°C (212 °F and 266 °F) respectively, I wanted to make sure it would not melt or warp in the heat of the engine bay over prolonged periods of time.

2018-06-02 011.JPG

After scouring a massive number of hardware stores in Japan, I finally found Royal Pro sold large sheets of polycarbonate at a maximum thickness of 3mm. I would have preferred 5mm for additional stiffness, but this will be adequate since it will not see any major stresses. Polycarbonate, or commonly referred to by the company name Lexan, is a super strong, flexible, heat and shatter-resistant clear polymer, often used as windows on race cars. I wanted to use this over other common plastics for those above qualities, especially as it is resistant to around 147 °C (297 °F). If the cooler side of my engine bay ever got to those temperatures, I’d have a lot more to worry about than melting plastic.

However, since this is all in the testing phase, I didn’t want to dive in and put down 7000¥ ($64 USD) for a sheet of polycarb. I found a very similar material with heat resistance up to 120 °C (248 °F), polypropylene (PP), at the 100¥ (dollar) store. At that price, I can do a lot of experimenting, so I opted for a 2mm thick sheet for now. Plus, its a reasonable size that I can forego with cutting down significantly.

2018-06-06 011.JPG

I figure this position would offer the most coverage of the battery and electronic connectors. A few holes, cuts, and a bit of rubber door edge protector at the edge it touches the hood, and the protector is finished.

2018-06-06 008.JPG

I just decided to piggyback off the existing battery tie down mount for a simple, clean installation. I used threading connectors to attach the top screws with the battery tie downs and two water-resistant foam and stainless washers to prevent leakage down through the holes. This should be more than adequate to run off excess moisture and prevent battery shorts.

I will pull out the drill next time.

August 14, 2018 /William Tjipto
JAPAN, JDM, SUZUKI, ALTO, ALTO WORKS, HA11S, CAR, KEI CAR, CAR LIFE, F6A, RHD, スズキ, アルト, アルトワークス, 自動車, 軽自動車, 日本, 車
Cars, Japan, Ownership, Project Sachiel
Comment
  • Newer
  • Older

Powered by Squarespace